Table of Contents
Creating Appointments either from Check-In and Patients Page
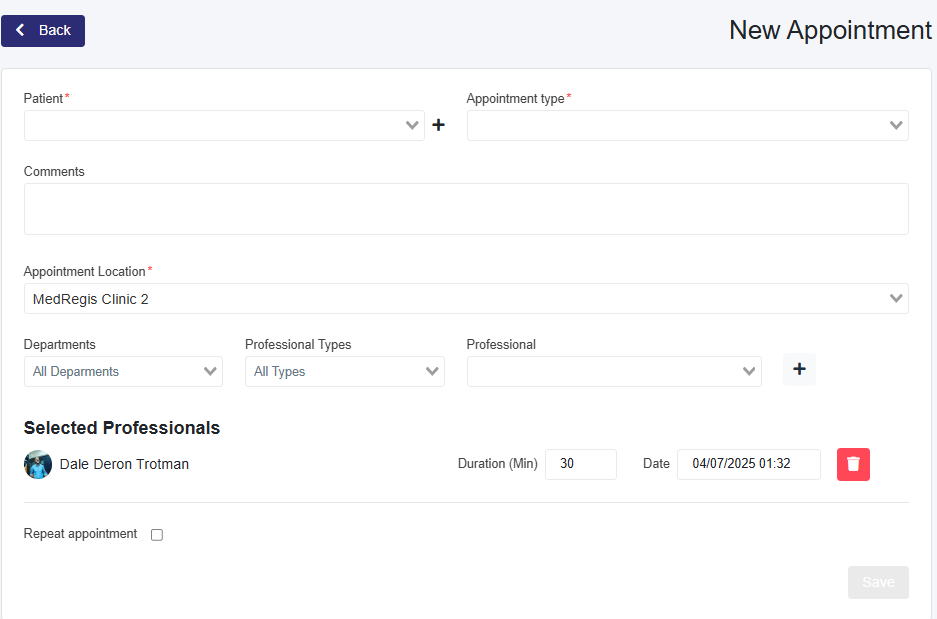
Creating an Appointment from the Check-In (Today) Page
-
- Click + New Appointments.
- Select the patient in the Patient dropdown box or use the + button next to it to create a new patient.
- Choose the Appointment Type.
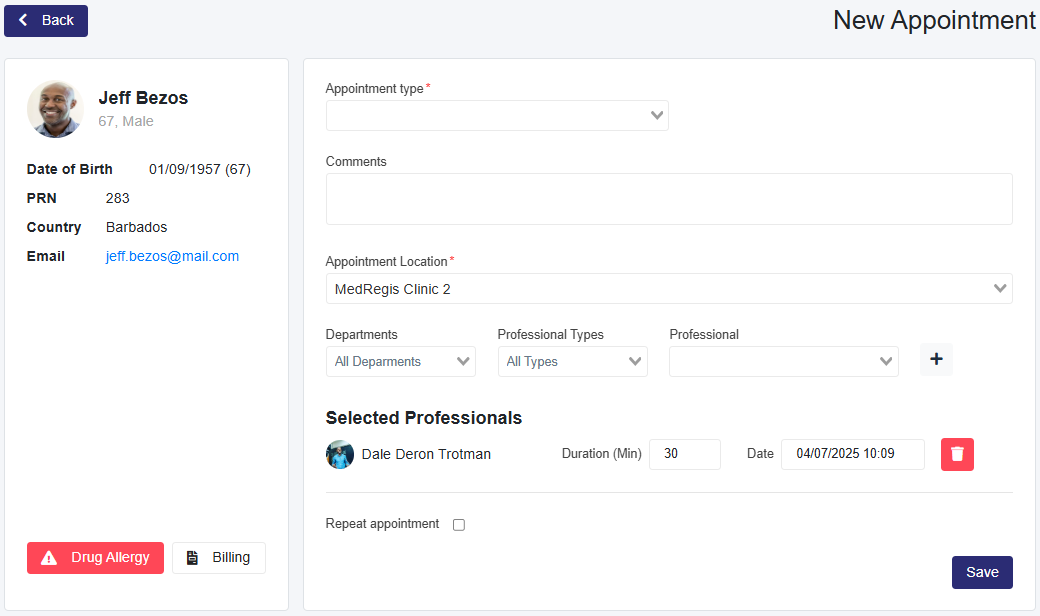
Creating an Appointment from the Patients Page
-
- Select a patient from the table, and to the right of that patient, click the calendar icon to create the appointment.
- Use the search options or the table to find the patient.
- Click the calendar icon next to the patient’s name.
- Choose the Appointment Type.
- Select a patient from the table, and to the right of that patient, click the calendar icon to create the appointment.
Continuing to Create the Appointment
1. Add Comments (Optional)
-
Enter any comments for the doctor or nurse.
-
Comments appear on the Appointment Card on the Check-In (Today) page.
-
Front desk staff can use comments to alert medical staff about patient issues.
-
If vital signs are taken, they can be entered here for the medical professional to record in the consultation note.
Patient Comments
-
Patients can add comments through their portal if they created the appointment.
-
These comments will appear in the comments section of the appointment.
2. Appointment Location
-
Select the appointment location.
-
This option is available only for clinics with multiple locations.
3. Assign a Medical Professional
-
If You Are a Medical Professional:
-
You are automatically added to the appointment.
-
To add another professional, select them from the list (filtering by department or type is optional).
-
Click + to add them.
-
If you are creating the appointment for someone else, you may remove yourself.
-
Once selected, you can:
-
Adjust the appointment duration, date, and time.
-
Remove professionals from the list.
-
-
-
If You Are an Administrative User:
-
Select the medical professional from the list (filtering is optional).
-
Click + to add them.
-
4. Save the Appointment
-
After confirming the assigned professionals, click Save.
5. View the Calendar
-
The updated calendar will display below the appointment details.
-
Recurring appointments are marked with a semicircle arrow icon.
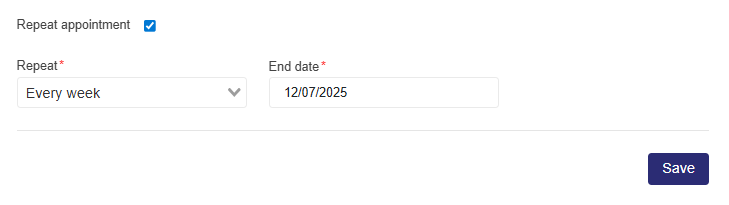
6. Repeat Appointments (Optional)
-
To create a recurring appointment:
-
Check the Repeat appointment box.
-
In the dropdown, choose the repeat frequency.
-
Set an End Date for when the recurring series should stop.
-
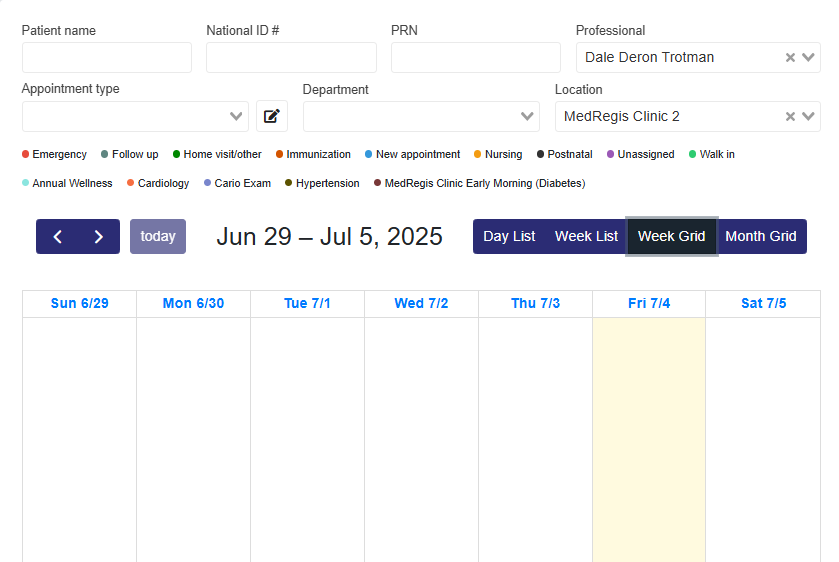
Quickly Creating Appointments (Scheduler and Professionals Pages)
From the Scheduler Page
-
- Select the Medical Professional from the dropdown menu.
- Click the desired date on the calendar using the Week or Month grid view.
- A pop-up will appear where you can enter the
- Patient
- Appointment Type
- Time
- Duration
- Comments (Optional)
- Click Create to finalize the appointment.
- The new appointment will now appear on the calendar.
From the Professionals Page
-
- For Administrative Users:
- Click the eye icon to the right of the user for whom you are creating the appointment.
- For Administrative Users:
-
- For Medical Professionals:
- Click the edit icon to the right of the user for whom you are creating the appointment.
- For Medical Professionals:
-
- This will load the Edit Professional Page with the scheduler below.
- Select the appointment date on the calendar using the Week or Month grid view.
- A pop-up will appear, allowing you to enter the Appointment Information.
- Click Create to finalize the appointment.
- The new appointment will now appear on the calendar.