Table of Contents
Invoices and Payment Receipts vs. Sales Receipts
- Invoices: These are used for multiple payments to clear a bill, with a payment receipt issued for each payment.
- Sales Receipts: Issued for full payments at the end of the appointment.
Sales Receipts and Invoices Tables
Sales Receipts:
- Color Code: Green for fully paid receipts. Grey for Drafts.
- Search by Patient or Sales Receipt #.
- Actions Column: Edit or view receipts.
- Receipts that an organization (e.g., the patient’s employer) shows a blue building icon in the Sales Receipt # column.
Invoices:
- Color Code and Filter:
- Grey: Drafts
- Red: Due (past-due invoices not in Draft)
- Blue: Unpaid
- Green: Paid
- Search by Patient or Invoice #.
- Actions Column: Edit, view, or create payment receipts.
- Invoices covered by insurance or an organization (e.g., the patient’s employer) show icons:
- Green Shield: Insurance
- Blue Building: Organizations

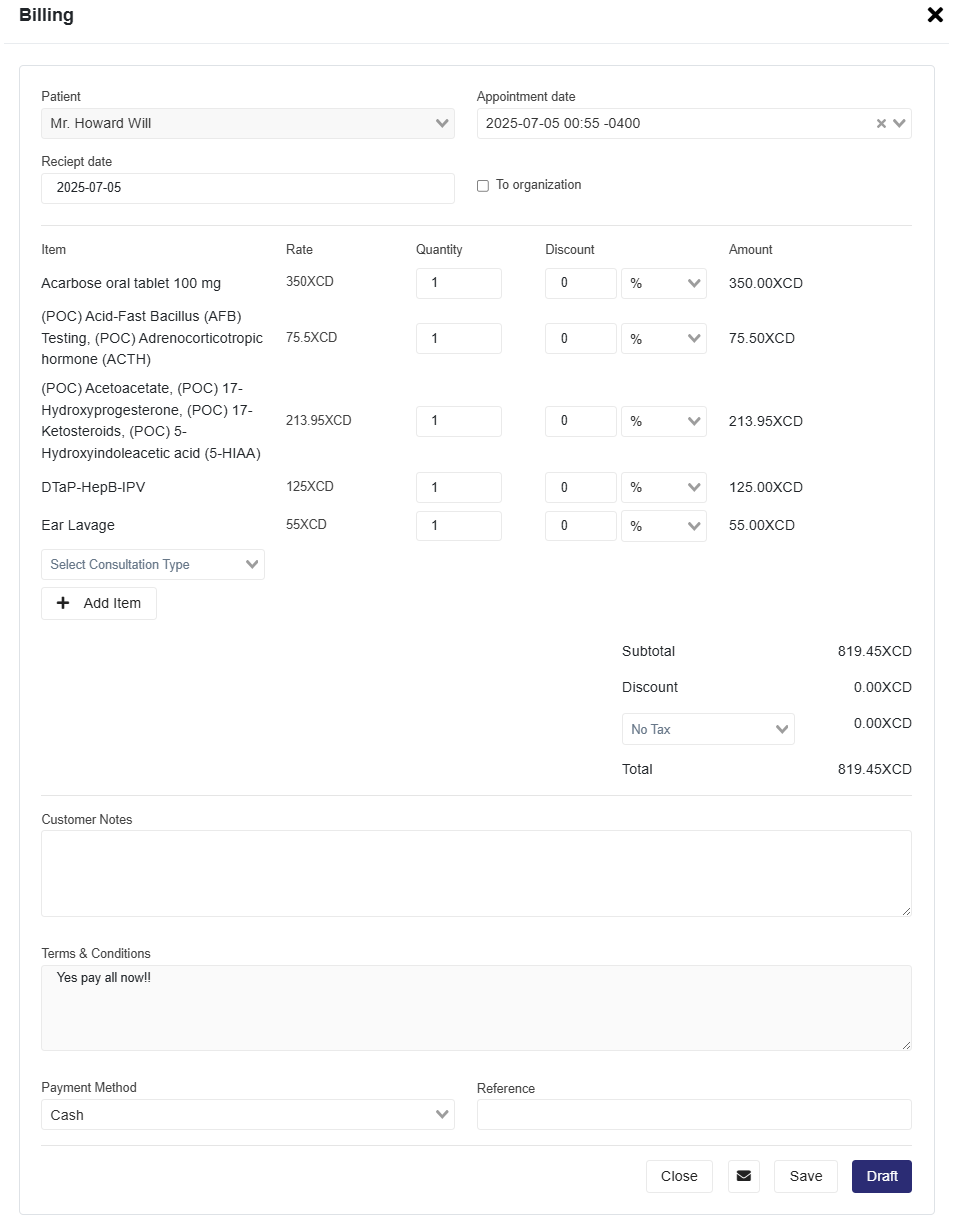
To Create a Sales Receipt
- Select Sales Receipt from the Sales Receipts | Invoices toggle.
- Click +New Receipt to open the Sales Receipt page.
- Select the patient, and this action loads the last appointment date.
- The Receipt date is defaulted to the current date.
- You can change the Appointment date to another date.
- Add the Organization that is paying for the bill if applicable.
- The ‘To Organization’ checkbox only shows if the patient has this information already saved to their profile.
- Any Billable items added to the Objective and Plan sections of the Consultation Notes from the selected Appointment date and time will automatically be added to the Bill.
- The Consultation Type must be added from the Select Consultation Type dropdown. Consultation Types are created under Pricing and Taxes.
- Add any additional Items using the +Add Item dropdown. Additional items are created under the Other section in Pricing and Taxes.
- Add discounts, taxes, or customer notes as needed.
- Save and Send, Save or save as a Draft.
To Create an Invoice
- Select Invoice from the Sales Receipts | Invoices toggle.
- Click +New Invoice to open the Invoice page.
- The details for the Patient, Appointment date, and Receipt date are entered automatically.
- Select the Terms that will automatically change the Due Date.
- Add the Insurance or Organization that is paying the bill if applicable.
- Insurance provides 3 dropdowns for the user to select the type of insurance that will be added to the Bill.
-
- Primary Insurance
- Secondary Insurance
- Tertiary Insurance
- Each type of insurance added will show on each individual line item.
- This will load a Total Insurance Coverage section in the Totaling section of the invoice, where you can see the total amount covered by the insurance.
- The user will then decide the % or amount of insurance coverage for each line item.
-
- The ‘To Organization’ checkbox is selected when an organisation and not the patient is paying for the bill, for example, an employer.
- This checkbox only shows once the patient has an organisation already saved to their profile. See the How to Add an Organization to an Invoice section below.
- Select this checkbox to add the Organization that will be billed
- Insurance provides 3 dropdowns for the user to select the type of insurance that will be added to the Bill.
- Any Billable items added to the Objective and Plan sections of the specific Consultation Note will automatically be added to this Invoice.
- The Consultation Type must be added from the Select Consultation Type dropdown. Consultation Types are created under Pricing and Taxes.
- Add any additional Items using the +Add Item dropdown. Additional items are created under the Other section in Pricing and Taxes.
- Add discounts, taxes, or customer notes as needed.
- Save and Send, Save as a draft, or Send.

To create a Sales Receipt or Invoice that is not part of an appointment
- Deselect the Appointment date.
- In this scenario, you can only add Items or a Consultation Type since Medications, Procedures, Labs/Imaging, and Immunizations must be added to a Consultation Note to be added to a Bill.
How to Add Insurance to a Patient Profile.
- When creating or editing a patient’s profile, there is a section called "Insurances" where you can enter insurance information for the patient and designate the Primary, Secondary, and Tertiary Insurance.
How to Add an Organization to a Patient Profile
- To create and add a patient to an Organization, please review the Organizations article.
- Also, in the patient’s profile, the Organization dropdown allows you to select an organization from the list of existing organizations.
- By default, the selected organization for the patient will show in the drop-down; however, if you change the organization here, it will add that patient to the new organization and remove it from the previous organization.
Viewing and Managing Receipts and Invoices
- View details by selecting the eye icon in the Actions Column.
- Use the top-right buttons to Edit, Delete, Print, or Download the Invoice or Sales Receipt.
- When you select an Invoice with Payment Receipts, a section at the top of the page will show created Patient Receipts with the above options.

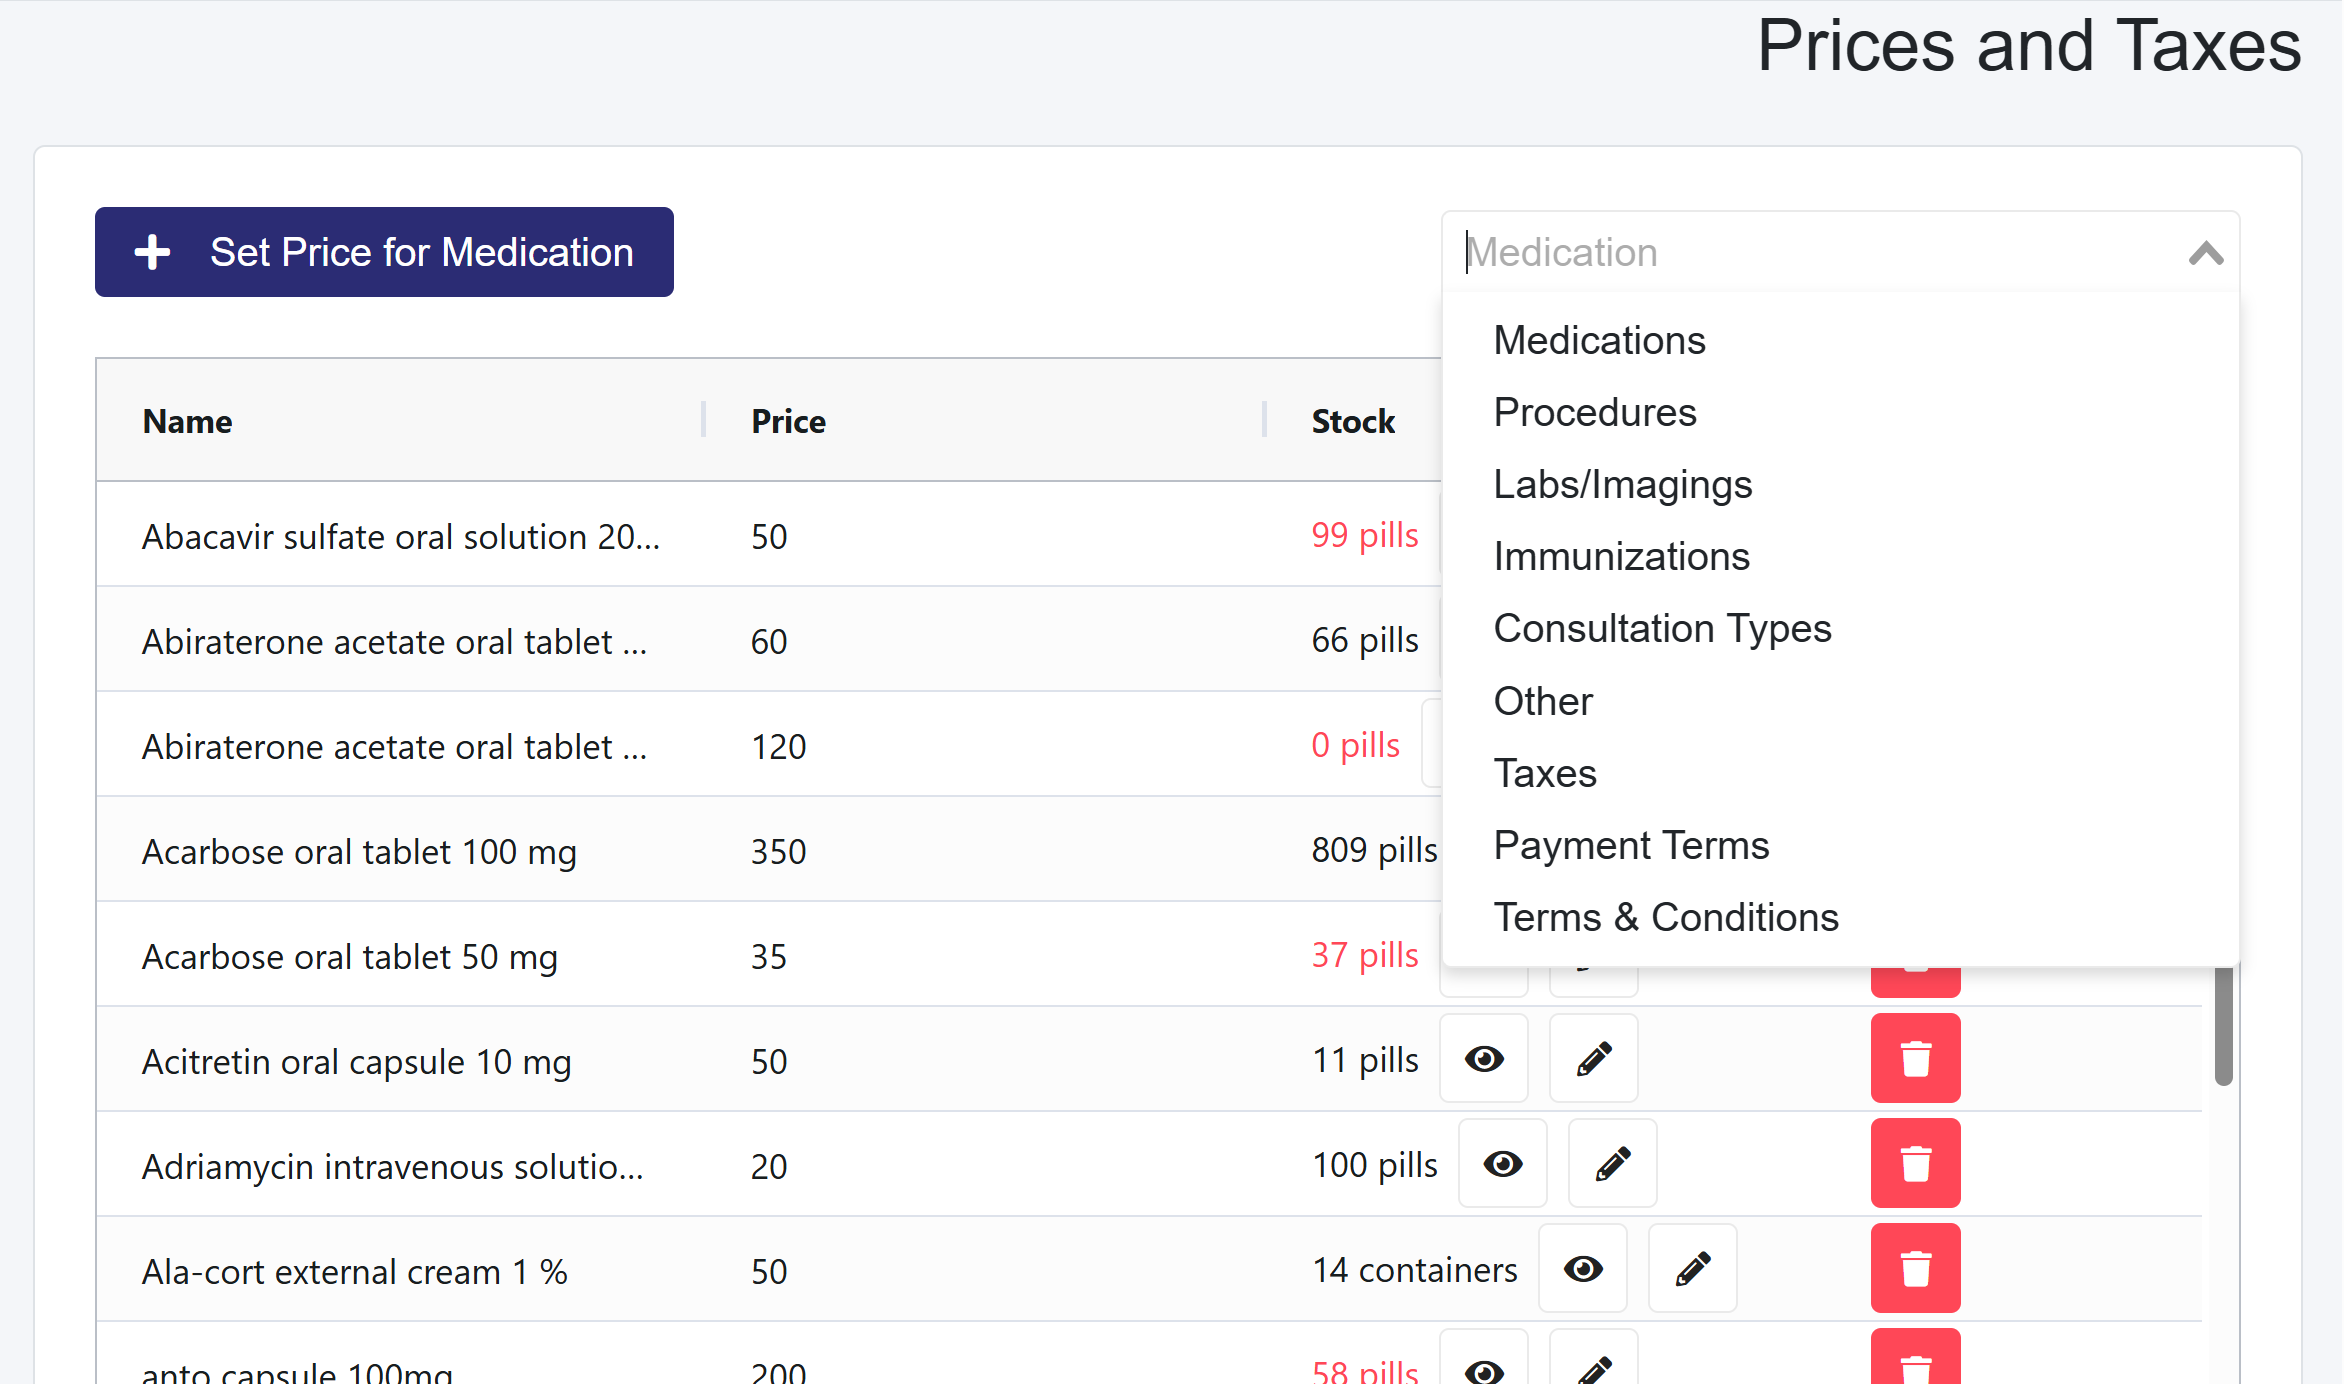
Pricing and Taxes
Pricing for Billable Items (Labs, Medications, Procedures, Immunizations)
- Go to the Billing dropdown and select Pricing and Taxes.
- Select one of the four categories (Labs, Medications, Procedures, or Immunizations) from the dropdown menu. For a visual walkthrough on how to add items to the bill automatically when consulting a patient, refer to this video.
- Click the + Set Pricing button, enter details, and click Save.
Adding Inventory and Stock Alerts
- Go to the Billing dropdown and select Pricing and Taxes.
- By default, you will be on Medications, where you will see a table that has saved medications, or it will be empty due to no medications being created as yet.
- If no medications are created, you have to make them first before you create the Inventory.
- Select the medication you want to create an inventory for within the table by selecting the Set Stock button.
- Enter the Current Stock amount and the Stock Unit.
- Select the Enable Notification checkbox to enter the Notification Threshold, which alerts when the user has fallen below a specific amount.
- This notification will show in the Notifications Center.
- Save

Additional Financial Options in the dropdown to the right
- Consultation Types: Standard patient fees, such as appointment fees for children, adults, and tourists, can be created here.
- Other: Any item the clinic bills for that would not be considered part of the first four (Labs, Medications, Procedures, Immunizations) sections, such as Ambulance Services.
- Taxes: Add applicable taxes to Sales Receipts and Invoices.
- Payment Terms: Define invoice due dates.
- Terms and Conditions: Create terms for invoices and receipts.
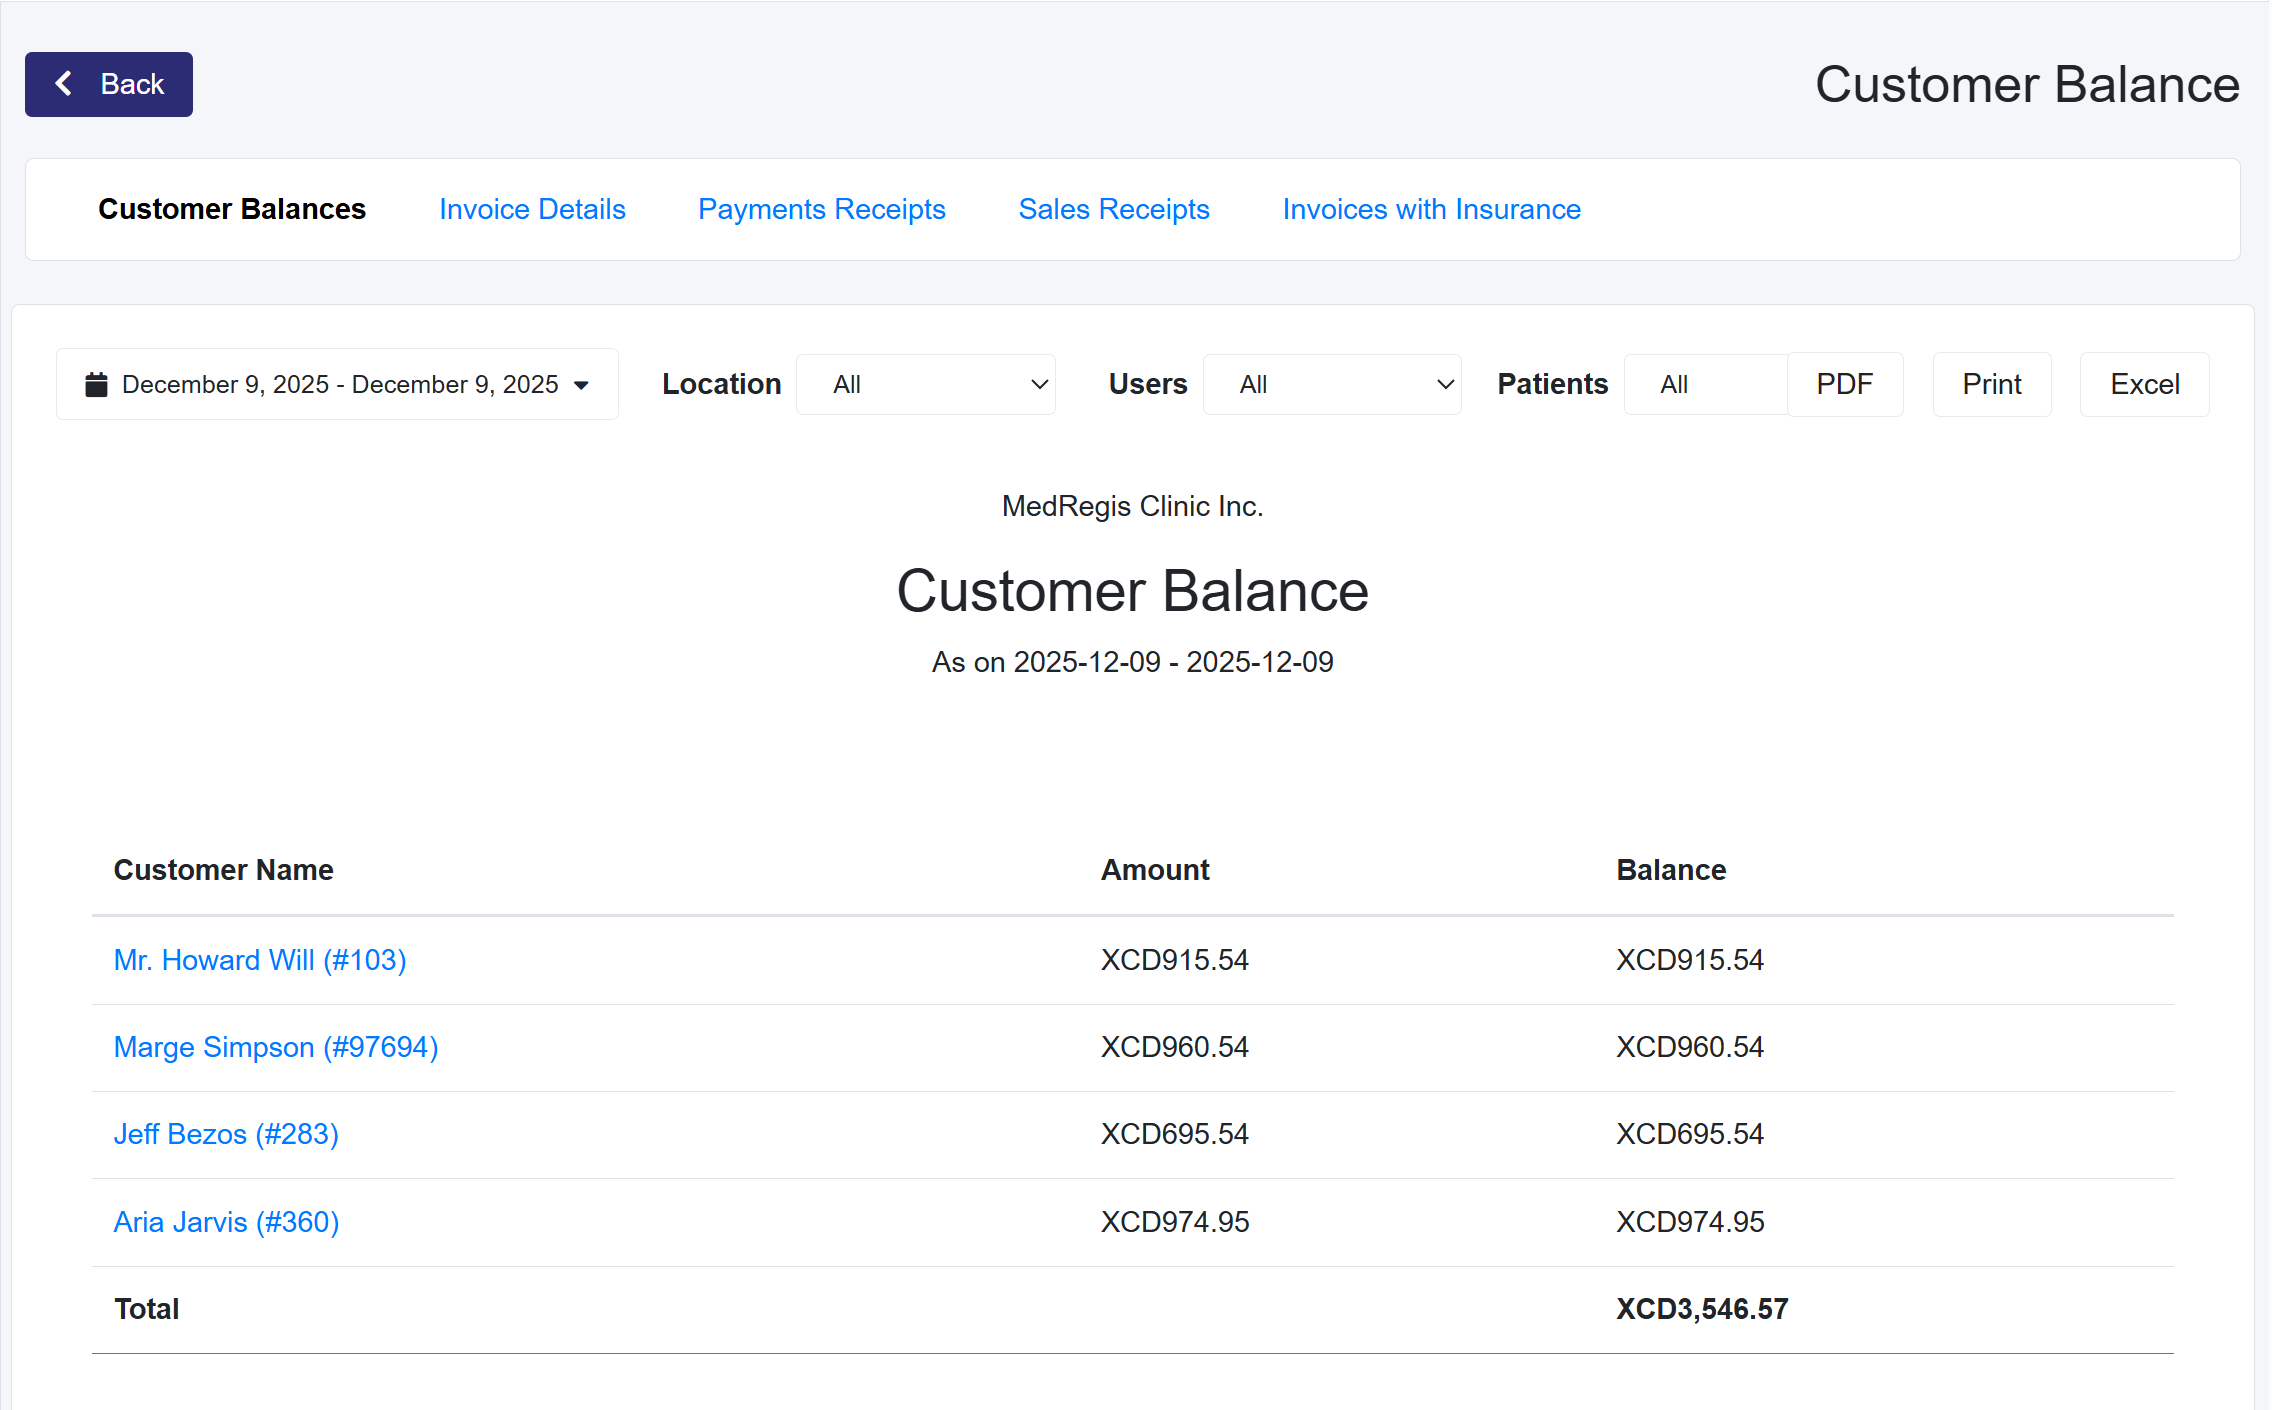
Report Options
- Receivables
- Customer Balances
- Invoice Details
- Payments Received
- Payment Receipts
- Sales Receipts
- Insurance
- Invoices with Insurance

Reports
Users can generate various accounting reports for invoices and receipts related to patient appointments or other patient billing.
For all Reports, you can:
- Search by various periods.
- Set the location you are creating the report for (optional, and only if your clinic has more than one location)
- You can download it as a PDF, Excel, or print the document.