Table of Contents
Unassigned Explanations
Use Unassigned appointments when:
- Your clinic operates on a first-come, first-served basis, so that the next patient will see the next available doctor.
Creating Appointments (Check-In and Patients Page)
- Creating an Appointment from the Check-In (Today) Page
-
- Click + New Appointments.
- Select the patient in the Patient dropdown box or use the + button next to it to create a new patient.
- Creating an Appointment from the Patients Page
-
- Select a patient from the table, and to the right of that patient, click the calendar icon to create the appointment.
- Use the search options or the table to find the patient.
- Click the calendar icon next to the patient’s name.
- Select a patient from the table, and to the right of that patient, click the calendar icon to create the appointment.
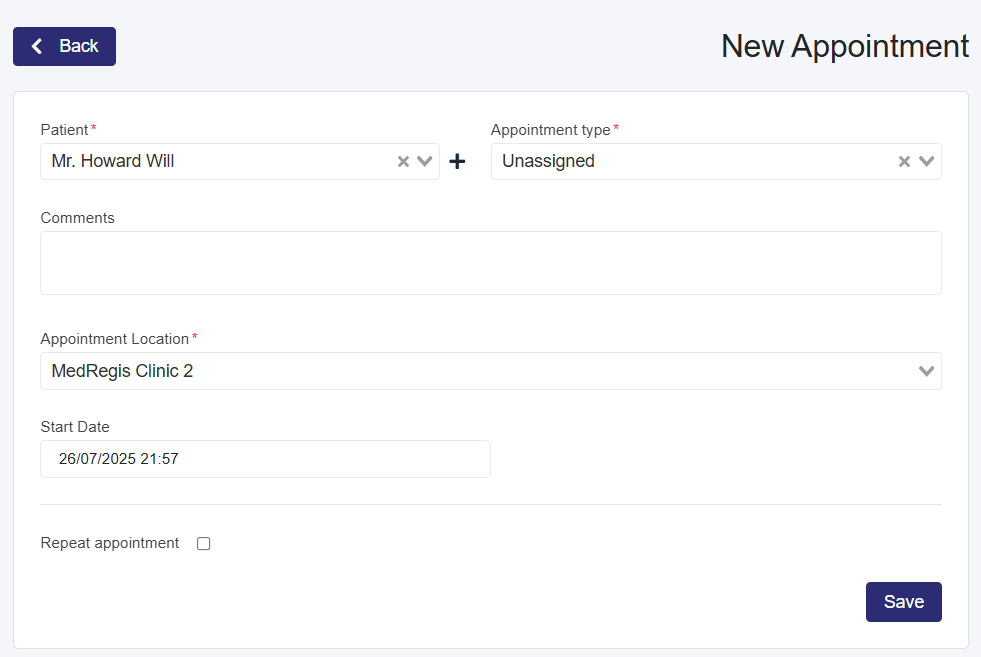
- Select an Appointment Type
- Select Unassigned for the Appointment Type
- This will remove the option to add a medical professional to the appointment.
- Select Unassigned for the Appointment Type
- Add Comments (Optional)
- Enter any comments for the doctor.
- These comments will appear on the Appointment Card on the Check-In (Today) page. Front desk staff can use comments to alert medical staff about something related to the patient. If they take vital signs, they can enter them here for the medical professional to record in the patient's consultation note while reviewing the patient.
- Appointment Location
- Select the appointment location (only applies to clinics with multiple locations).
- Enter the Start Date
- Select the Date and Time of the appointment
- Repeat Appointments
- Select the Repeat appointment check box
- In the Repeat dropdown, select the repeat period
- In the End date dropdown, select the date the recurring appointments end.
- Save the Appointment
- After confirming the assigned professionals, click Save.
- View the Calendar
- The updated calendar is displayed below, and the appointment details are highlighted in purple.
- Repeat appointments will have a semicircle arrow icon.
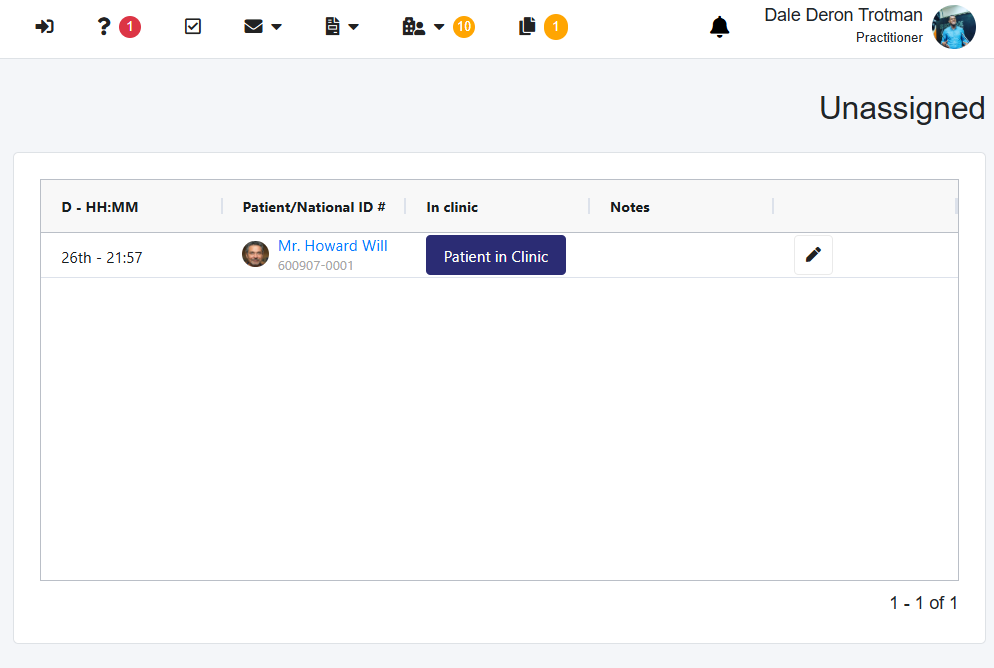
Assigning a Medical Professional to an Unassigned Appointment
- On the Unassigned tab in the top taskbar, you will see the number of Unassigned appointments change as you create Unassigned appointments.
- Click on the Unassigned tab, and this will load a page with a table of all unassigned appointments
- The Patient in Clinic button allows you to check in the patient.
- You can also do this on the Check-In page after you add a medical professional to the appointment.
- Select the edit icon in the Actions column.
- On the page that loads, change the Appointment Type from Unassigned.
- Select the medical professional or medical professionals you want to add to the appointment.
- When you add the first medical professional, it will ask if you want to start the consultation
- Select Ok- Place the appointment ‘In Consultation’ and it automatically navigates to the Consultation Notes.
- Select Cancel- The appointment will either be in Unchecked, or in Waiting if you check in the patient on the previous page via the Patient in Clinic button.
- Select Save when finished.