Table of Contents
On the Patient Page, you can:
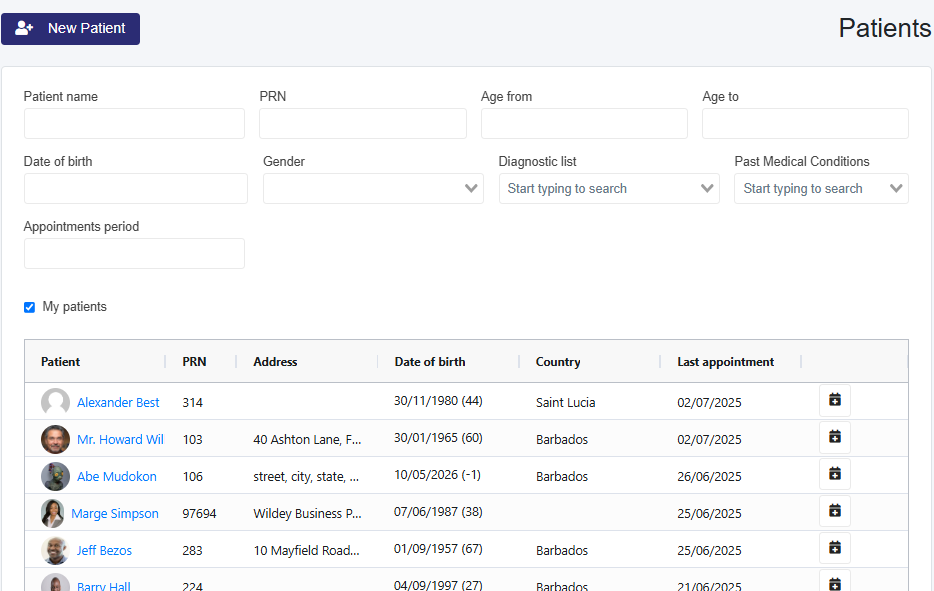
- Search for a patient using a combination of options
- Clinic Admin and Clinic Admin Plus have the options to search by Diagnostic List and Past Medical Conditions.
- (Administrative) Clicking on a Patient in the Check-in/Today table opens the Patient Profile (name, contacts, next of kin, etc.), where edits can be made.
- (Medical Users) Clicking on a Patient in the Check-in/Today table opens their Medical Profile page. If you click on their image (if uploaded) or image placeholder (if no image is uploaded), it will open the Patient Profile (name, contacts, next of kin, etc.), where edits can be made.
Creating a Patient from the Patient Page
1. Select the Patients tab in the left taskbar.
2. Click the New Patient button. This will navigate you to a new page to create the patient.
3. Enter the required patient information. The Name and Date of Birth fields are mandatory.
-
- Reminders can be sent via Email, SMS, or WhatsApp
4. Click the Save button to create the patient.
5. A new section with five tabs—Addresses, Insurance, Contacts, Social History, and Next of Kin—will appear below. As you navigate through these sections, the information will autosave. On the Next of Kin page, to autosave, navigate to another tab or select Finish.
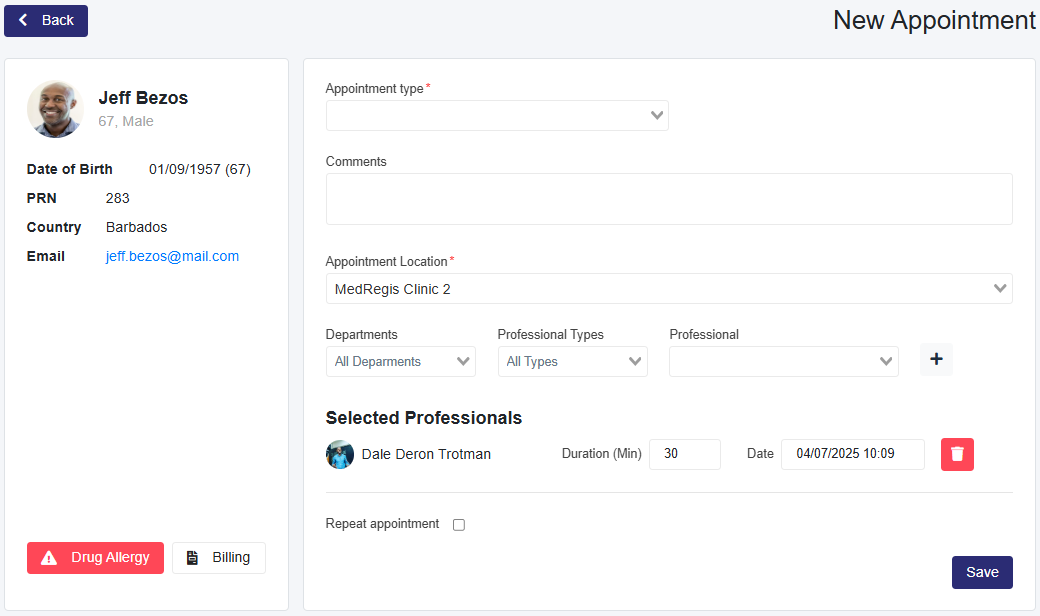
Creating Appointments
1. From the Patients Page:
-
- Use the search options or the table to find the patient.
- Click the calendar icon next to the patient’s name.
2. Select Appointment Details
-
- Choose the Appointment Type.
3. Add Comments (Optional)
-
- Enter any comments for the medical professional.
- These comments will appear on the Appointment Card on the Check-In (Today) page. Front desk staff can use comments to alert medical staff about something related to the patient. If they take vital signs, they can enter them here for the medical professional to record in the patient's consultation note during the consultation.
4. Appointment Location
-
- Select the appointment location (this option is only available for clinics with multiple locations).
5. Assign a Medical Professional
- If You Are a Medical Professional:
- You are automatically added to the appointment.
- To add another medical professional, select that person from the Professionals Filtering by Departments and Professional Types is optional.
- Click + to add them.
- If you are creating for another professional, you can remove yourself from the appointment.
- After the professional is selected, you can:
- Change the appointment duration, date, and time.
- Remove users from the Selected Professionals
- If You Are an Administrative User:
- To add a medical professional, select that person from the Professionals Filtering by Departments and Professional Types is optional.
- Click + to add them.
- Repeat for multiple professionals, if necessary.
- After the professional is selected, you can:
- Change the appointment duration, date, and time.
- Remove users from the Selected Professionals
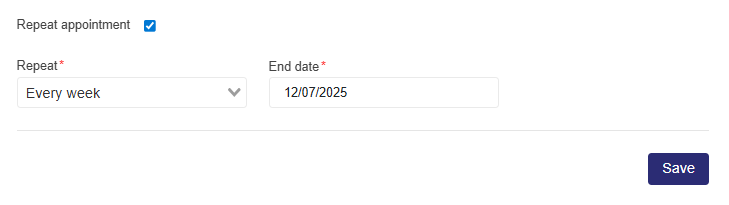
6. Repeat Appointments
-
- Select the Repeat appointment check box
- In the Repeat dropdown, select the repeat period
- In the End date dropdown, select the date the recurring appointments end.
7. Save the Appointment
-
- After confirming the assigned professionals, click Save.
8. View the Calendar
-
- The updated calendar is displayed below the appointment details.
- Repeat appointments will have a semicircle arrow icon.