Search for the professional and click the pencil icon to open the Edit Professional page.
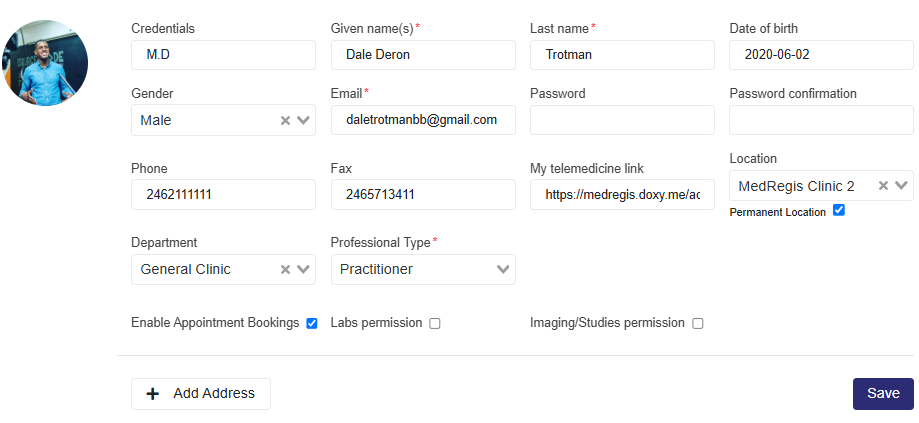
Select the Enable Appointment Bookings checkbox.
PLEASE NOTE:
The patient will see the appointment location only if your Permanent Location is set. If you select your location on a day-to-day basis, it will not be shown to the patient, since online appointments cannot be booked for the current day.
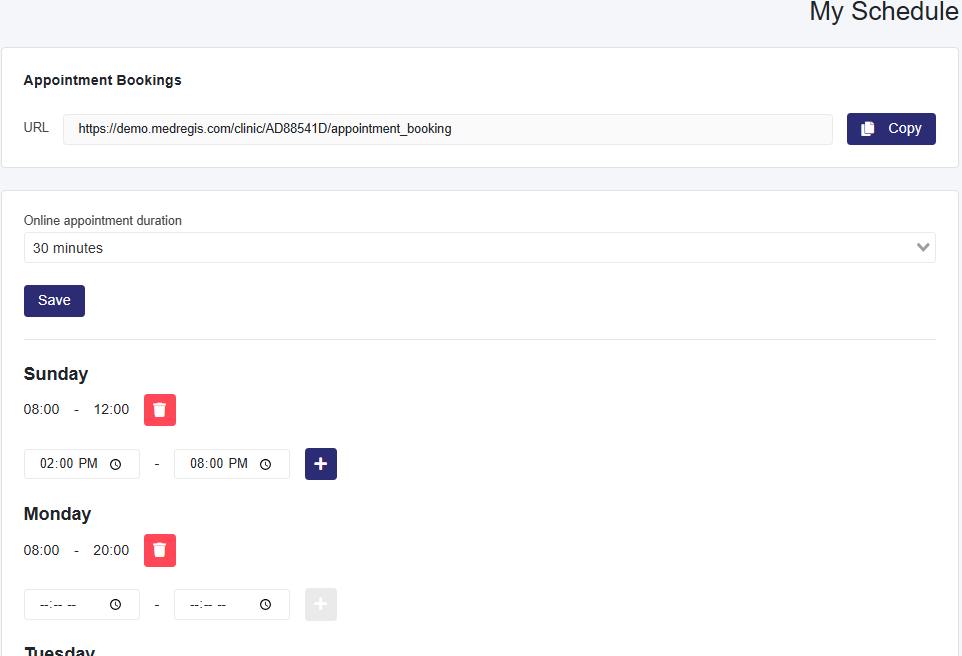
Set Your Appointment Schedule
Select the picture placeholder next to your name and job description, then choose My Schedule.
Use the Appointment Bookings link at the top of the page to share your booking link or to place it on your social media or website.
Select your appointment duration periods from the Online Appointment Duration dropdown box.
For each day, set your schedule:
Enter the working period and click the + button to add it for each working day.
Repeat for multiple shifts or break periods within a day.
Absence Periods
Enter periods you’ll be unavailable to prevent bookings during vacations or leave.
Please note: When a patient books an appointment, it will be displayed with a globe icon on the appointment card in the scheduler.