Letters, Email & Forms

Updated:

Please Note

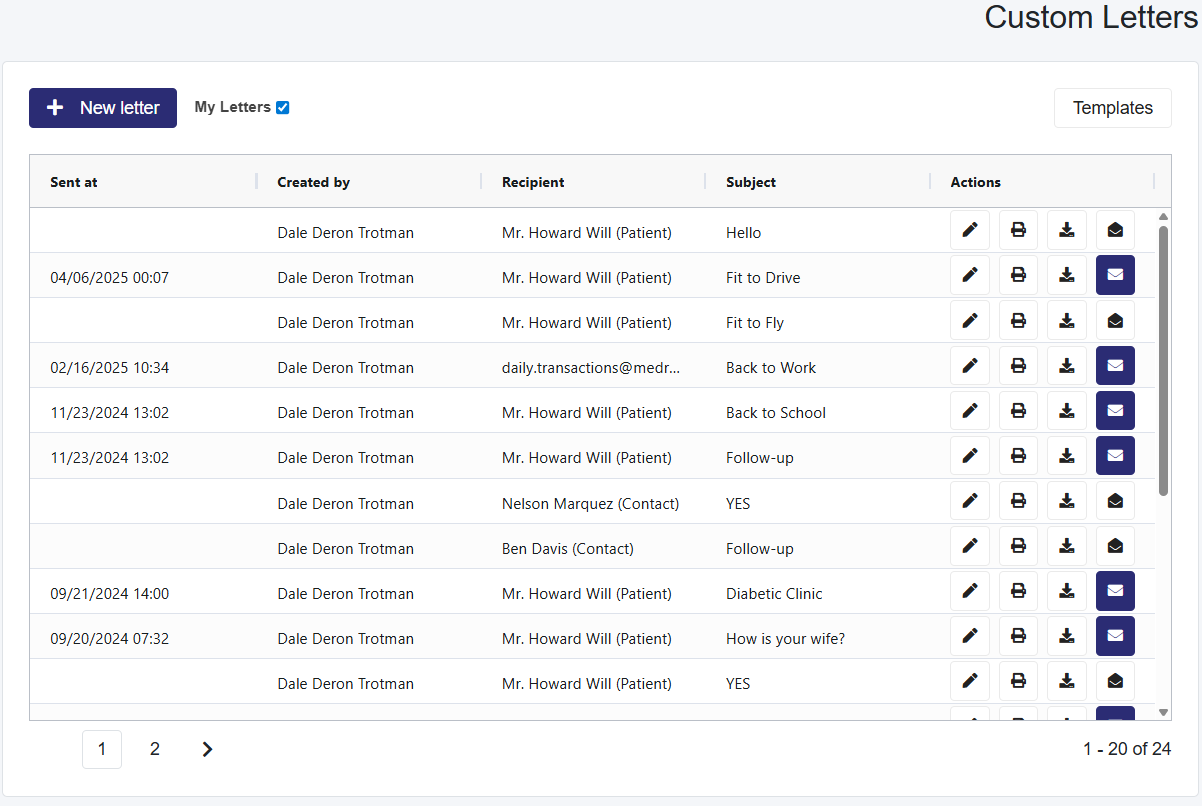
Emails for Referral Letters, Clinical Summaries, Billing, Reminders, Post-Visit Instructions, and Custom Letters: Send Text As: Attached PDF (message created in the email body is sent as a PDF) will automatically include your clinic name in the default email body message.

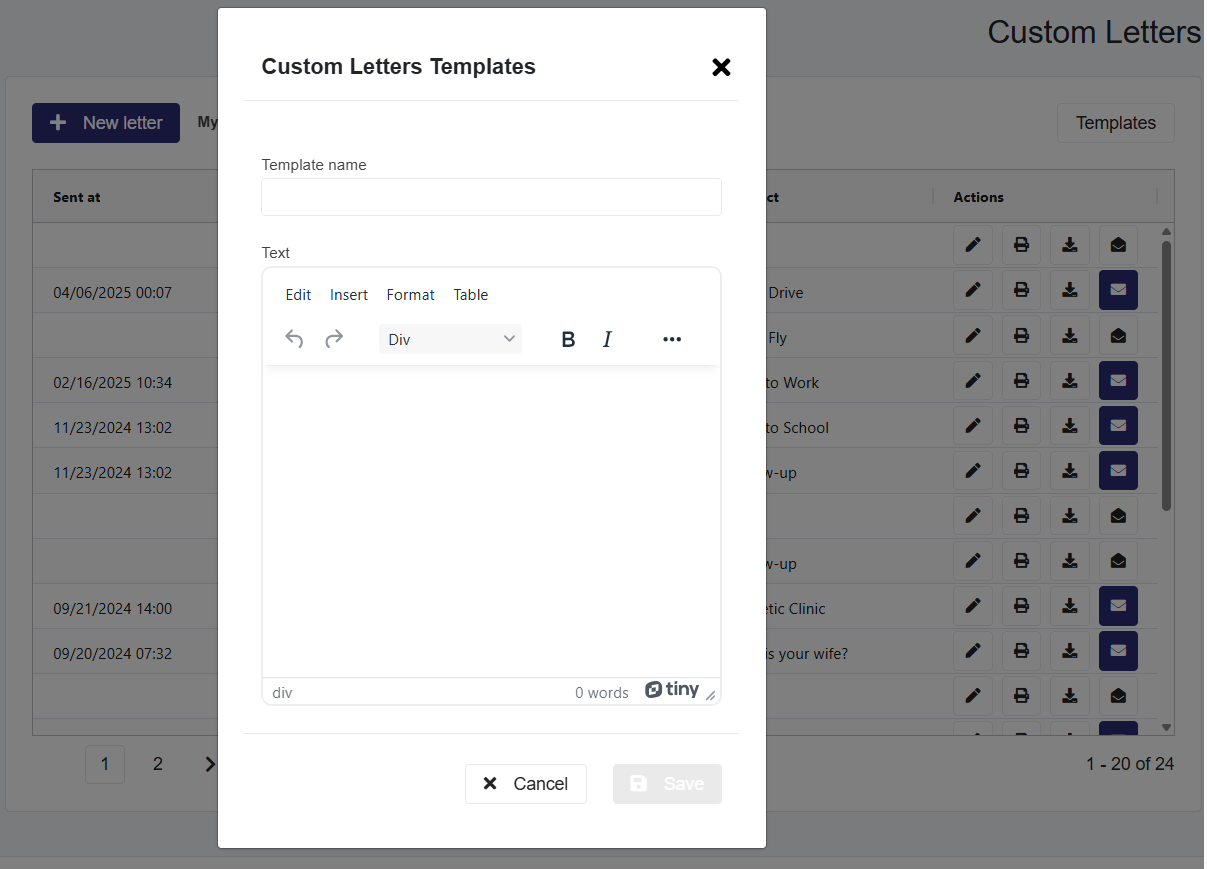
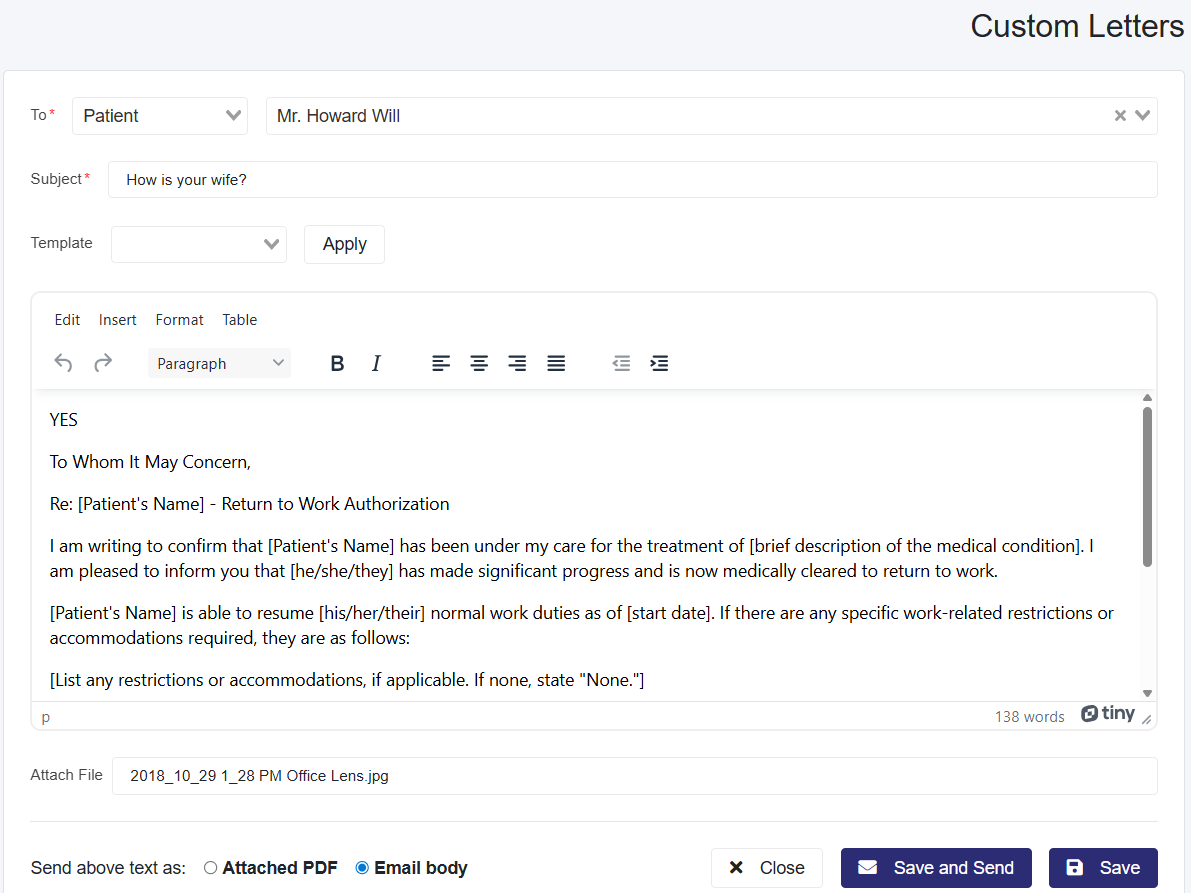
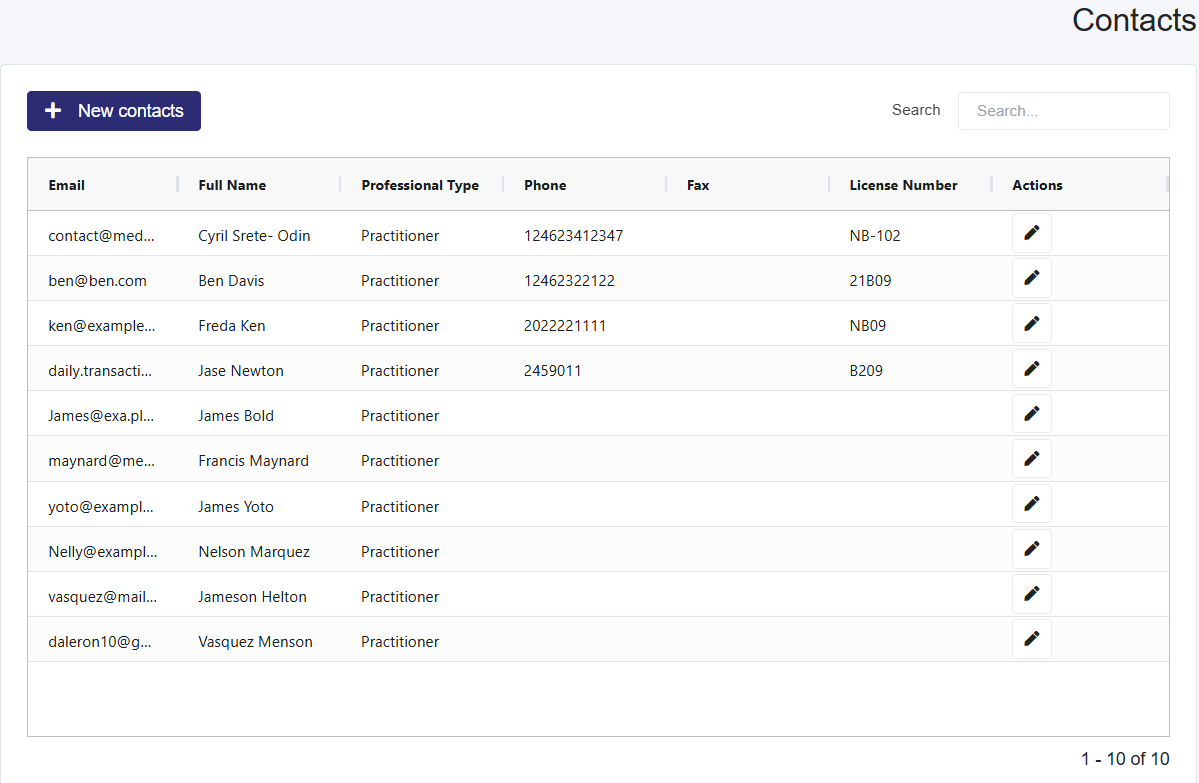
For Custom Letters: Send Text As: Email Body (the message is seen in the email body by the receiver); include your contact information in the email body. For faster documentation, add it to every template, or save a contact template to use when you need to add contact information in your message.

Table of Contents

Custom Letters

  1. Select the Letters dropdown in the top taskbar and Select Custom Letters
  2. This will load a page with a table of all Custom Letters
    • In this table, My Letters are selected by default. To see all letters sent to a patient, deselect it.
    • In the Actions section, you can edit, print, download, or email any saved Referral letters.

Create Templates for Custom Letters

  1. Select the Templates button to the right to activate a pop-up.
  2. On this pop-up called Custom Letters Template, you will see
    • Templates already created, which you can edit or delete.
    • and the + Add new button to create new templates
  3. Select the +Add new button, which will launch a section for you to create a template and provide a name for that template
    • When creating a template, you can utilize [ ] brackets for the information that will change from patient to patient.

      For a visual walkthrough, refer to this video.

  4. Select Save to create the template.

To Send a Custom Letter

  1. Select the + New Letter button to load the page to send emails called Custom Letter.
  2. In the To section, in the first dropdown, select between:
    • Patient- already in the system
    • Contact- created in the Contacts section
    • User- Professionals
    • Other- any email you enter
  3. Add a Subject to the email you want to send
  4. (Optional) Select a Template for the email from the dropdown and then select Apply.
  5. If you are not using a template, you can create your email in the provided Text field.
  6. Attach Files allows users to add any documents or images to the email.
  7. Send Above Text as:
    • Attached PDF—Instead of sending the email in the body, it will send it as a PDF. However, the email will still have an auto-created summary in the body.
    • Email body- The information created in the text box is saved in the body of the email.
  8. When finished, select Save and Send or Save

Forms

  1. Select the Letters dropdown in the top taskbar and select Forms.
  2. This will load a page with a table of all saved forms.
    • You can edit, print, or download any form in the Actions
  3. You can also send a form to the patient's portal

How to Create Forms

  1. Select the + New Form button
  2. This loads the page to create the form to the right and a preview of what you are making to the left.
  3. Enter the Form Name.
  4. Add the Description to explain the type of form.
  5. Now you have to decide the fields you will add. Each field will have a Forms Label, which in most cases will be your question for your patients, and a Form Description that further describes the question.
    • Text-  This allows the patient to enter their responses as text.
    • Number- This allows the patient to enter numerical responses.
    • Options- This allows the patient to select multiple options, which you will create in the Dropdown Options section, with each option created on a new line
    • Yes/No- This allows patients to select either yes or no.
  6. When finished, select the Save form button at the bottom.

Contacts

  1. Select the Letters dropdown in the top taskbar and Select Contacts
  2. This will load a page with a table of all Contacts
    1. You can search the table using the provided Search

Create New Contacts

  1. Select the + New Contacts button, which will load the New Contact page
  2. Enter the mandatory information and, if necessary, the optional information, including the address, which can be added by selecting the +Add Address
  3. Select Save
Scroll to Top