Table of Contents
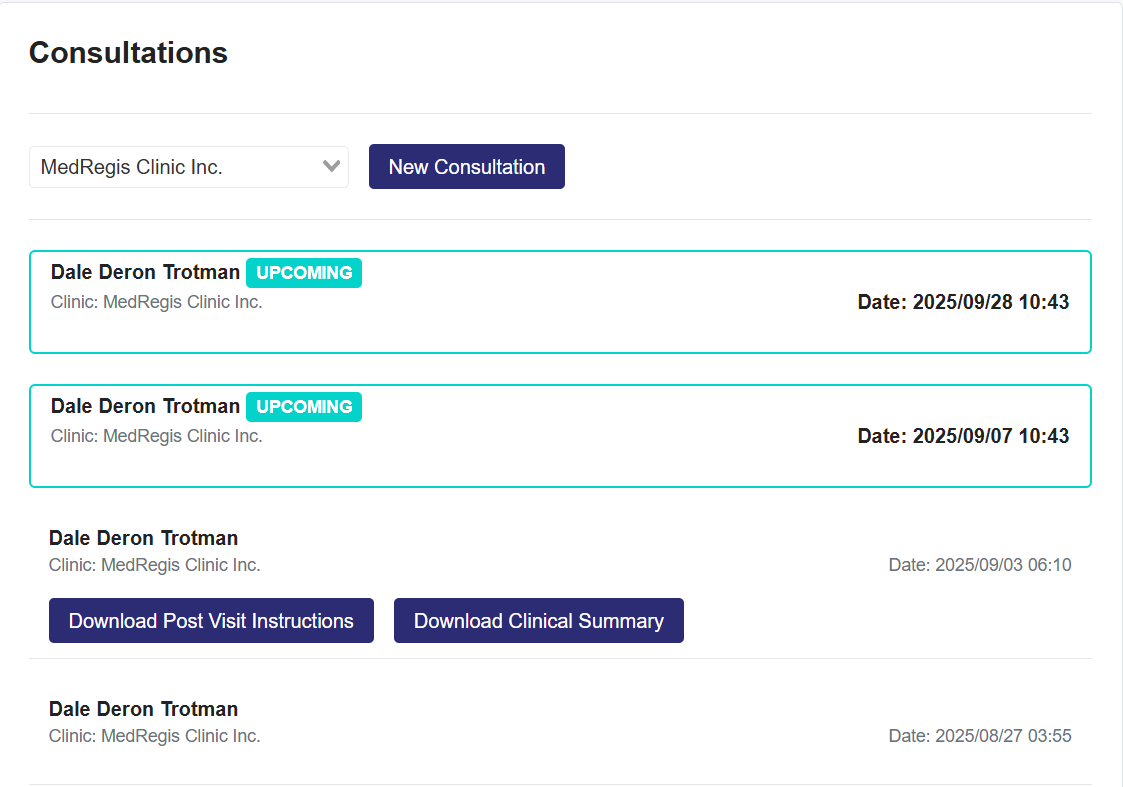
Consultations
Viewing Appointments and Shared Information and Documents
- In the Consultation Notes section, the user can see their upcoming and past consultation dates and times.
- If the doctor shared Post Visit Instructions or Documents, you will see them attached to the specific consultation.
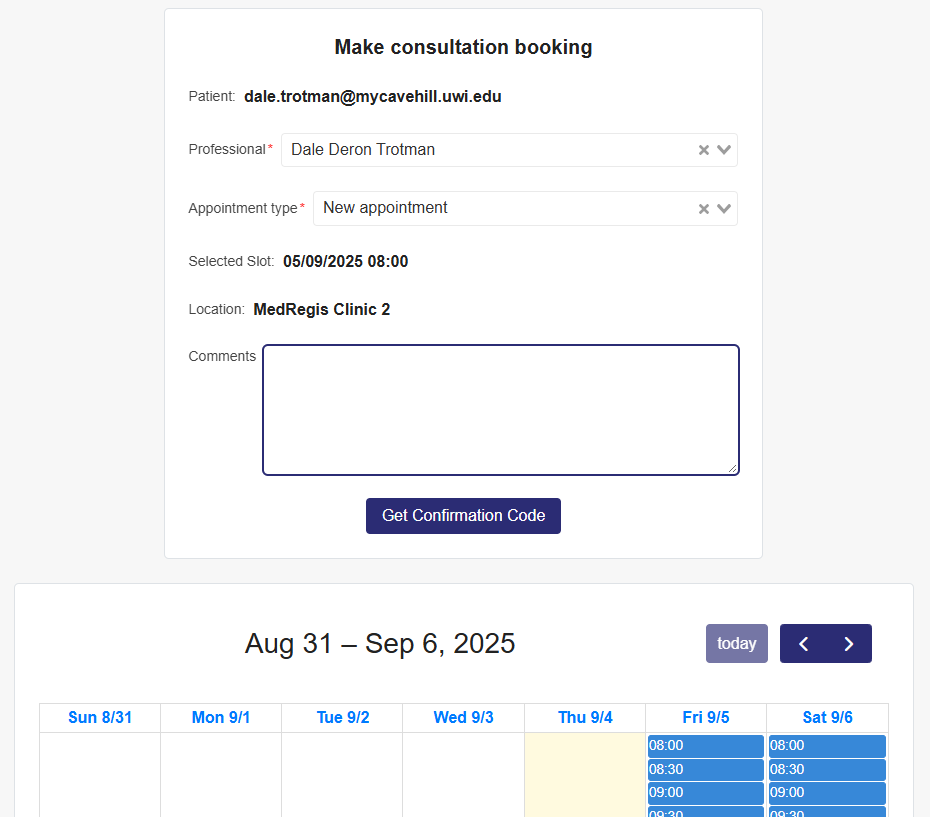
Create a Consultation
- Navigate to the Menu dropdown in the top left-hand corner. Click it and select
- Select the clinic in the dropdown that you want to create the appointment with
- If you are only connected to one clinic, that clinic will show by default.
- Select the New Consultation
- Enter the professional you will see for you’re appointment.
- Appointment Type: This will appear if that specific doctor allows patients to select the appointment type.
- Comments: Enter information that will be crucial for the medical professional to note for your appointment.
- Select the appointment date and time in the schedule below.
- The Get Confirmation Code button is activated, and by selecting it, a confirmation code is sent to the patient’s email.
- Enter the Confirmation Code in the related textbox.
- The Confirm Appointment button will appear, which you will click.
- The appointment is now confirmed and created.
Vital Signs
Navigating Vital Signs
- Select the Vital Signs you want to view in the dropdown, and it will show in the list below.
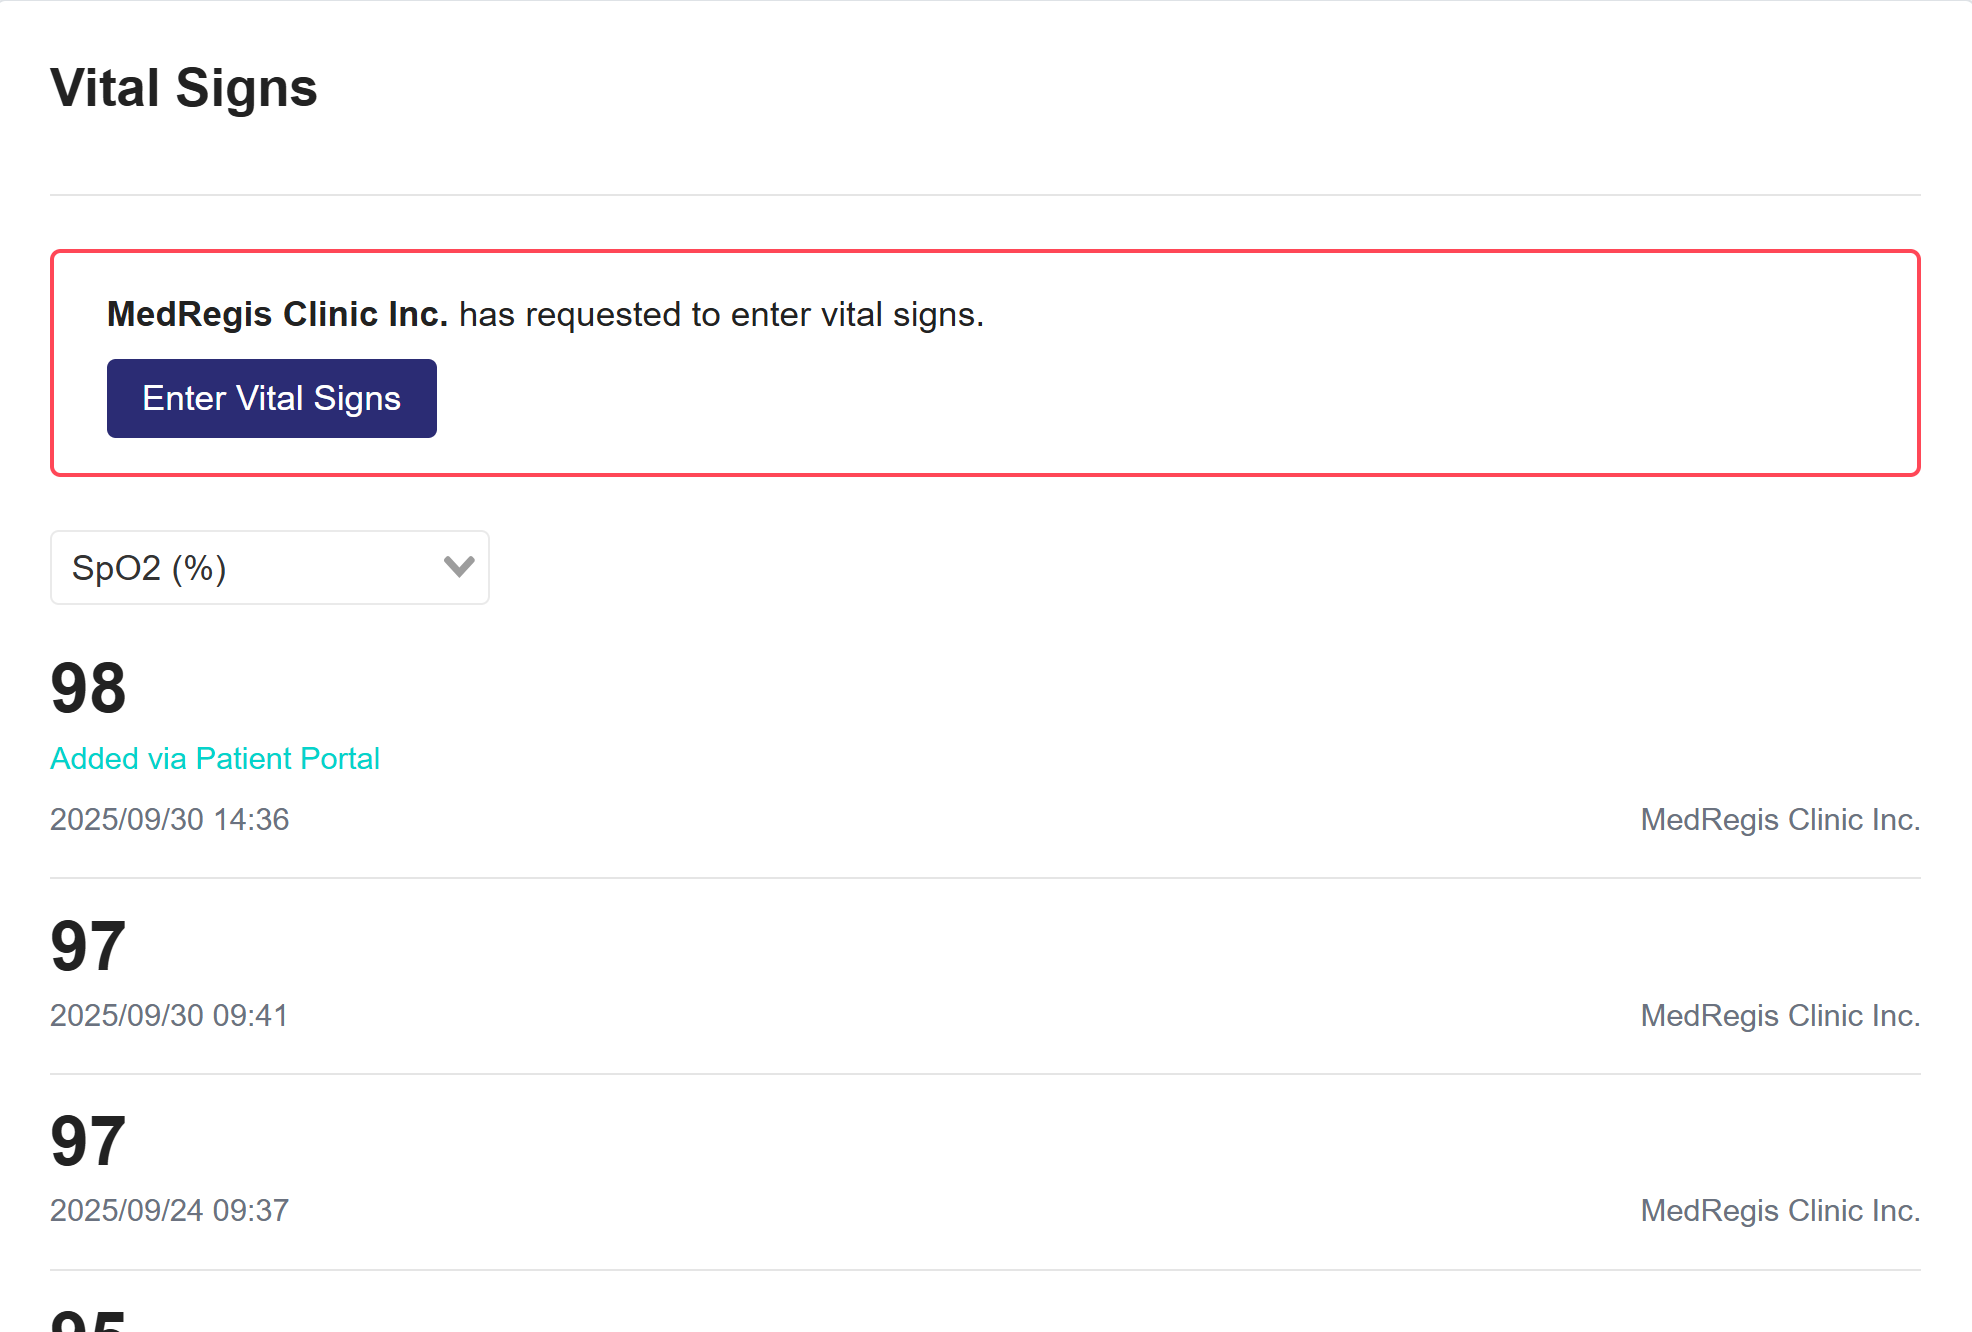
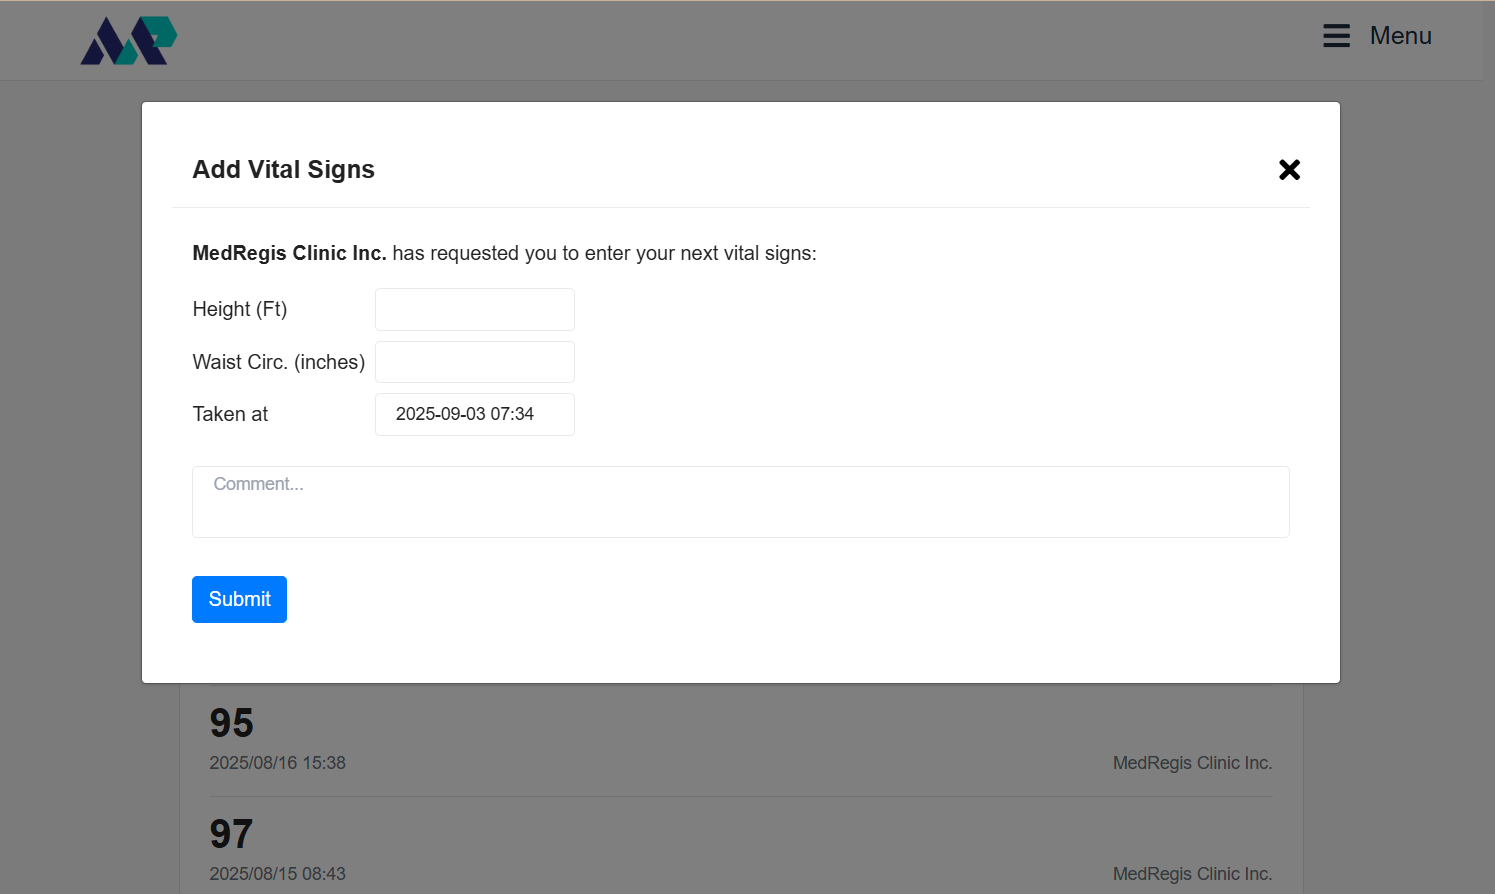
Entering Vital Signs, as requested by your clinic.
- If your clinic requests vital signs, you will see the box in the image to the right with the request.
- Select the Enter Vital Signs
- Enter the requested vital signs, the date and time taken, and any necessary comments.
- Submit
- The vital signs will add to the list of vital signs, and once you have the drop-down set to one of the vitals you entered, you will see the added vital highlighted with the message "Added via Patient Portal."
Clinic Requests Rules
-
When a clinic requests Vitals, Documents, or Forms, you will receive a notification.
-
Notifications are sent by WhatsApp, Email, or SMS, depending on the clinic’s chosen setting
Labs and Imaging
Navigating Labs and Imaging
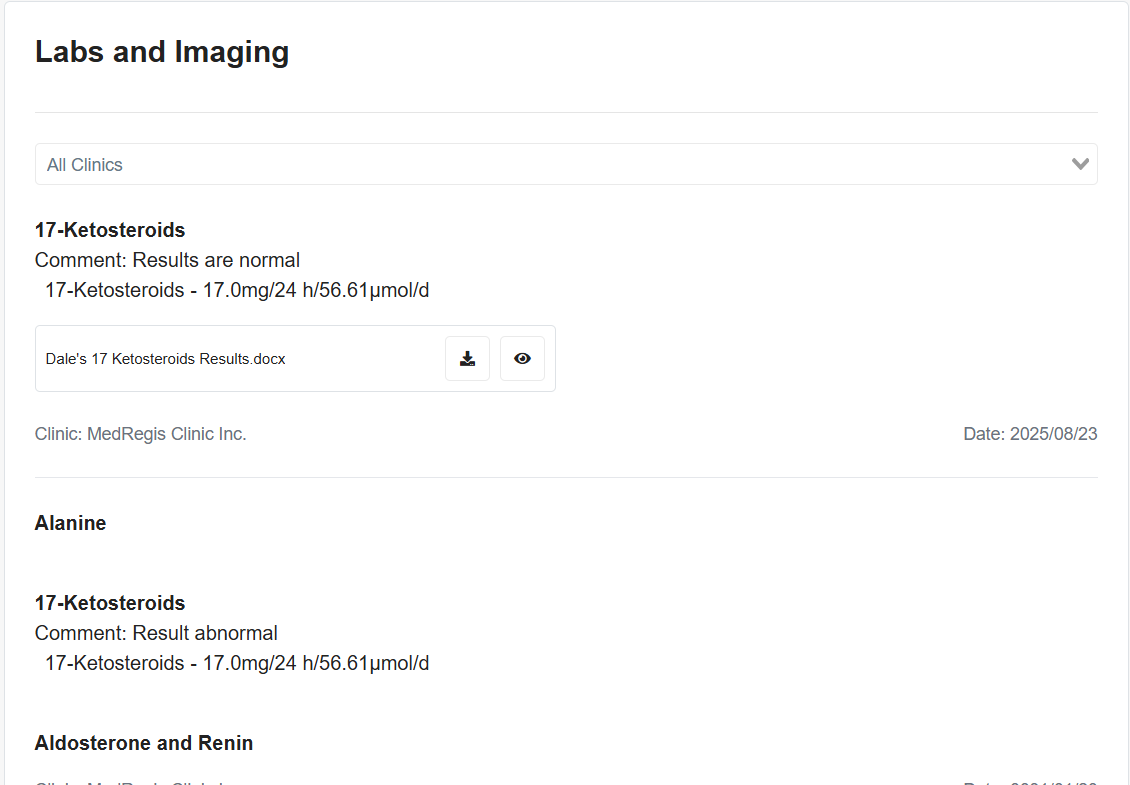
- The dropdown by default will be set to All Clinics. This list displays all your finalized lab and imaging orders.
- Labs or Imaging orders in the list below will have the following
- The name of the lab or imaging test
- Patient Comments (Once entered by the clinic)
- Results (Once entered by the clinic)
- The Lab Report (Once entered by the clinic)
- Some orders in the list may have more than one test attached.
Medical History
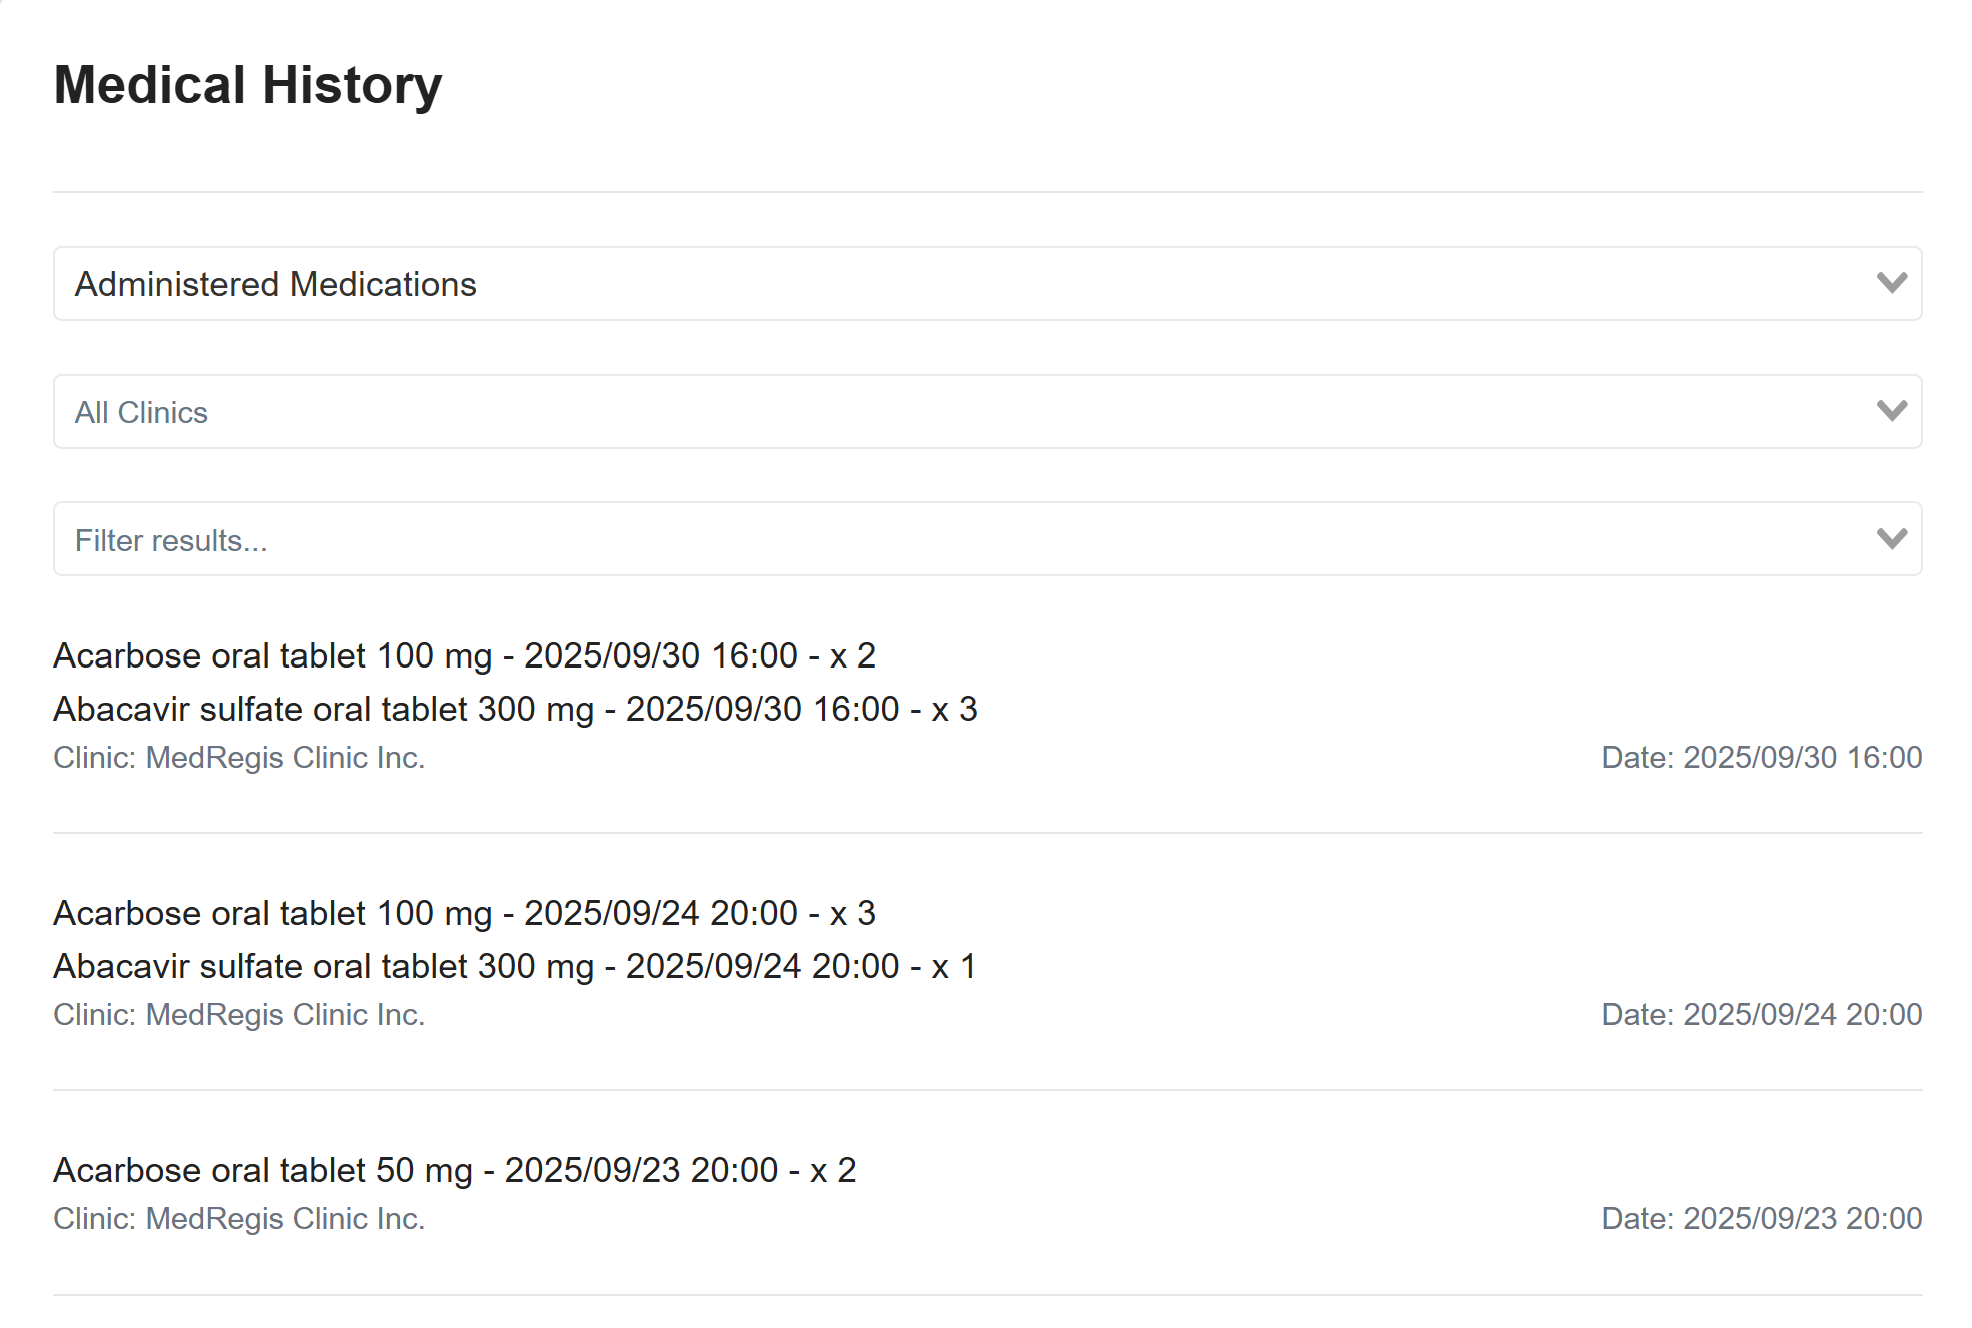
Navigating Medical History
There are three dropdowns at the top:
- Select the Type of Medical History you want to see
- Defaulted to All Clinics, but you can select which clinics you want to see information from.
- Filter by the options available for the Type of Medical History you selected in the 1st For example, if Administered Medications are selected
The list below displays the results of your selection.
Documents and Forms
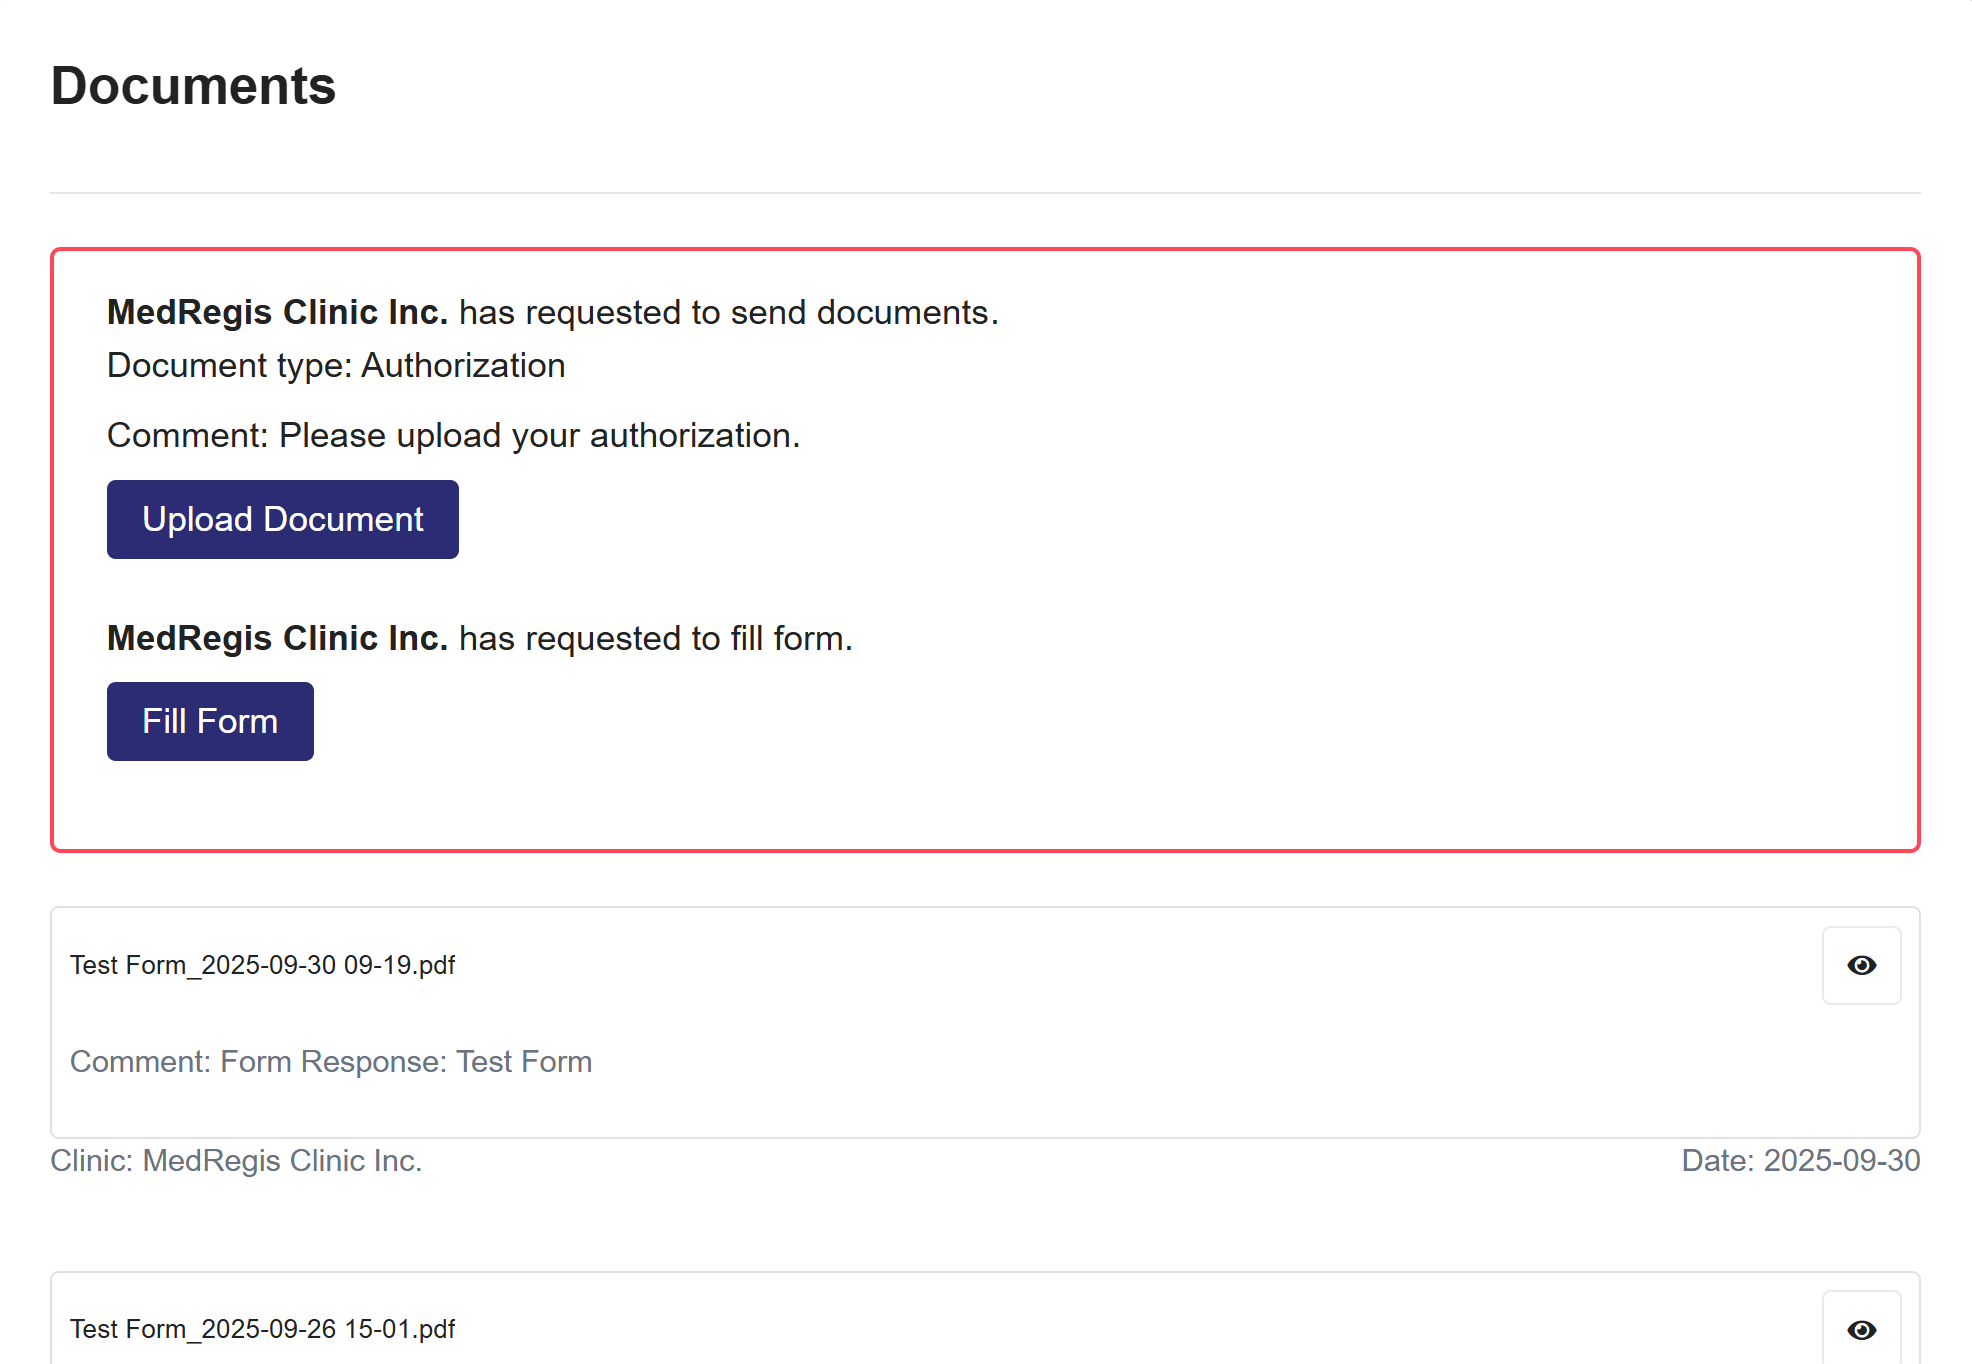
Enter Documents, as requested by your clinic
- If your clinic requests documents, you will see the box in the image to the right with the request.
- You will see the document type being requested
- Any comments (optional) included by the clinic
- Select the Upload Document button
- Search and upload the document, and it will autosave the document.
- The Document will be added to the list of documents below.
Filling Out Forms, as requested by your clinic
- Select the Full Form button
- Answer all the necessary questions on the form.
- Select Send form to save and send the form.
Shared Documents and Forms
- You will only see documents you upload or that were shared by your clinic or that you, as the patient, have uploaded.
Clinic Requests Rules
-
When a clinic requests Vitals, Documents, or Forms, you will receive a notification.
-
Notifications are sent by WhatsApp, Email, or SMS, depending on the clinic’s chosen setting
Share
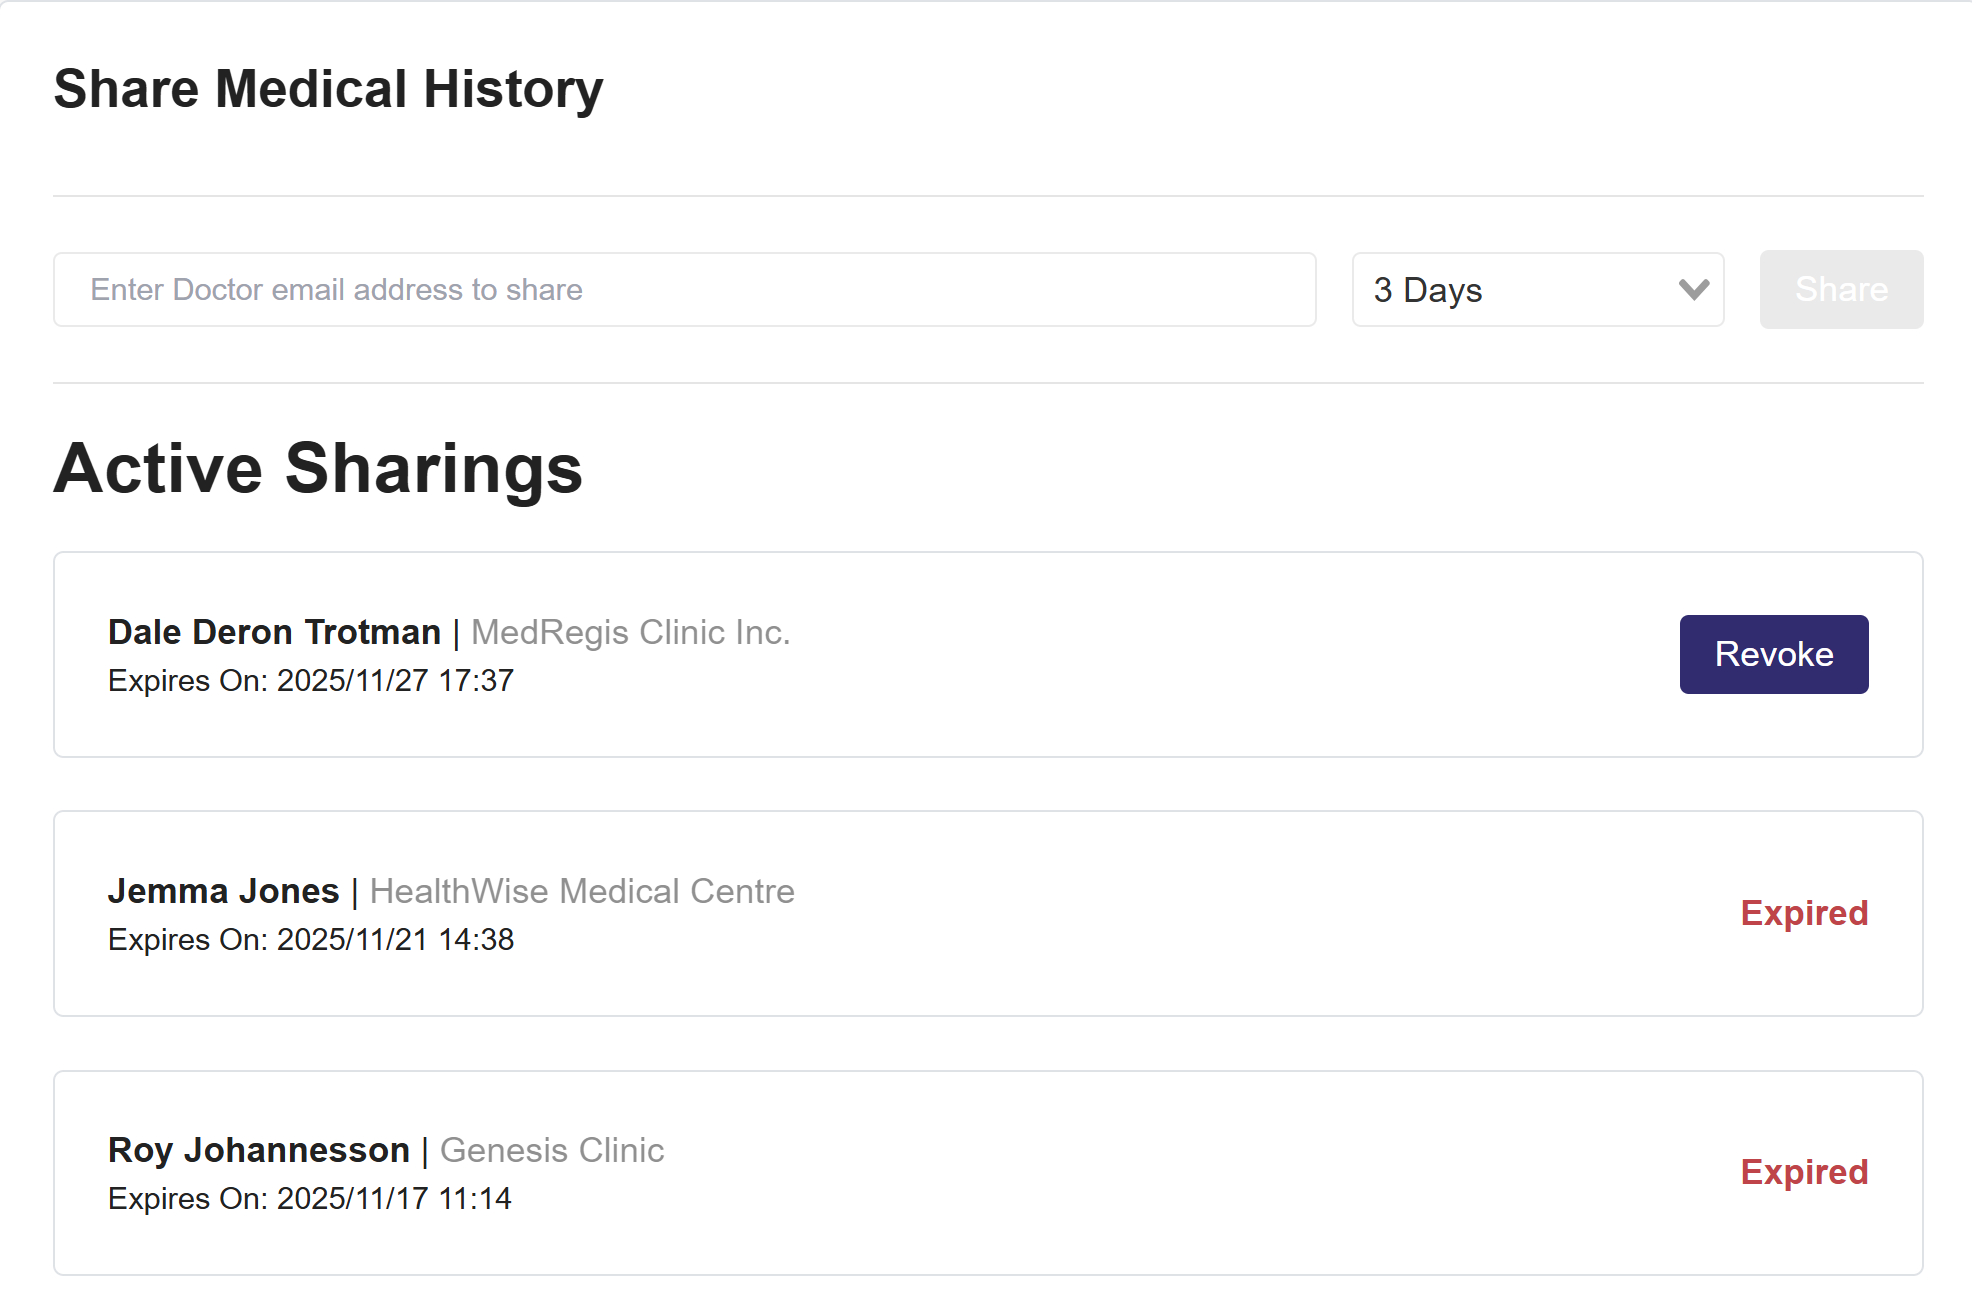
Share Medical History
- Enter the email of the medical professional you want to share your profile with.
- This medical professional must be using our system to access the information you are sharing
- Set the length of time you want to share your profile with this medical professional
- Select Share
Active Sharing
-
All medical professionals you’ve shared your information with will be listed here.
-
If sharing is still active, you will see the option to Revoke.
-
If sharing has ended, the status will display as 'Expired'.
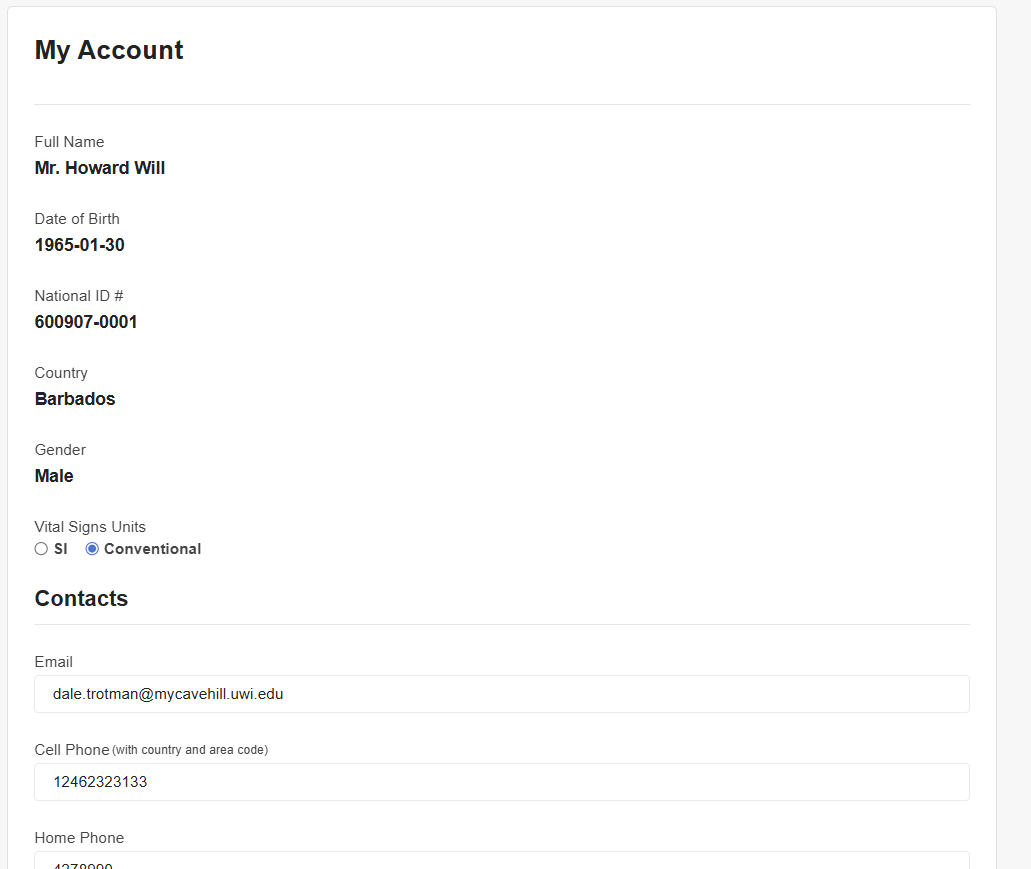
My Account
Here you will see your personal information, such as:
- Full Name, DOB, National ID #, Country, Gender, Contact Information, Parental Acceptance
- Vital Signs Units
Choose between SI Units and Conventional for your vital signs.