Table of Contents
Definitions (POC are only created within the Consultation Notes)
POC vs Diagnostic Tests
PLEASE NOTE: POCs are created only within the Consultation Notes because they are requested during an appointment, not from the Patient Medical Profile, where they will be saved as a Diagnostic Test (3rd party lab).
- Point of Care Tests (POC)—The Objective section has a Point of Care Test button to create this type of order, which is usually an in-house order. The POC lab order is saved to the Plan section, but the results stay in the Objective section.
- Diagnostic Tests (which are also created from the Patient's Medical Profile, which is accessed by selecting the patient from the patients page)—The Plan section includes a Diagnostic Test button to create this type of order, which is typically sent to a third-party lab or center. The Diagnostic Test order is saved in the Plan section. When the results are returned and added to the consultation note, they are saved in the Objective section. Diagnostic Tests are also created from the Patient's Medical Profile, which is accessed by selecting the patient from the patients page.
- Lab Technicians and any medical professional can upload Lab documents and results into the system. However, the doctor who created them must finalize them.
- Administrative users can only upload documents to a lab order.
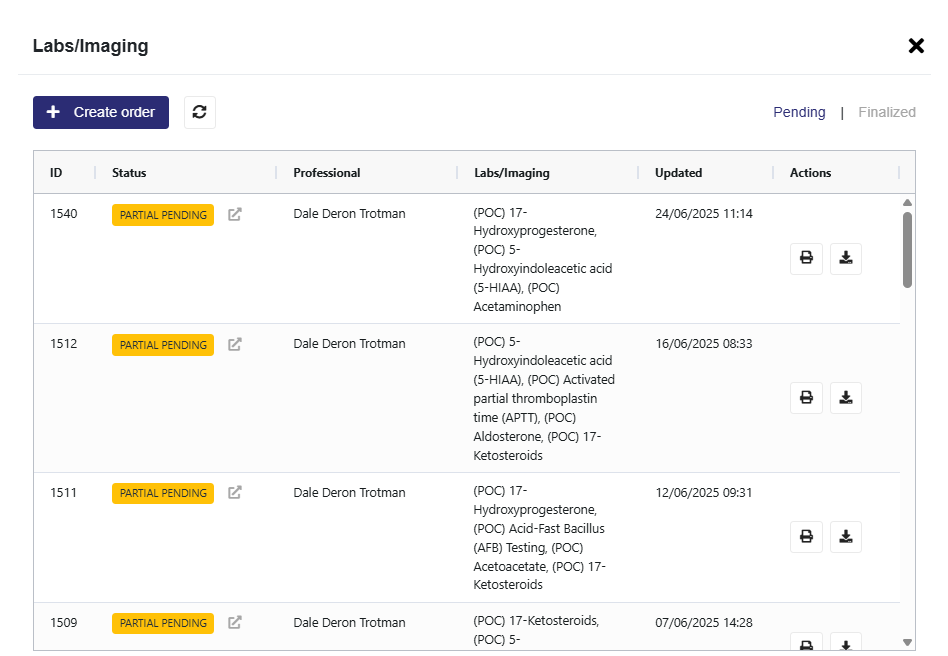
Lab Statuses and Actions
Pending Section
Pending- None of the tests have been completed or updated.
Partial Pending- One or more of the tests have been completed and updated, but not all.
Finalized section
Finalized - All labs were completed and updated.
Error - The order was placed in error.
Cancelled- The order has been cancelled.
Actions
Print– Print the Lab order to be delivered to the lab
Download- Download the Lab report to be delivered to the lab.
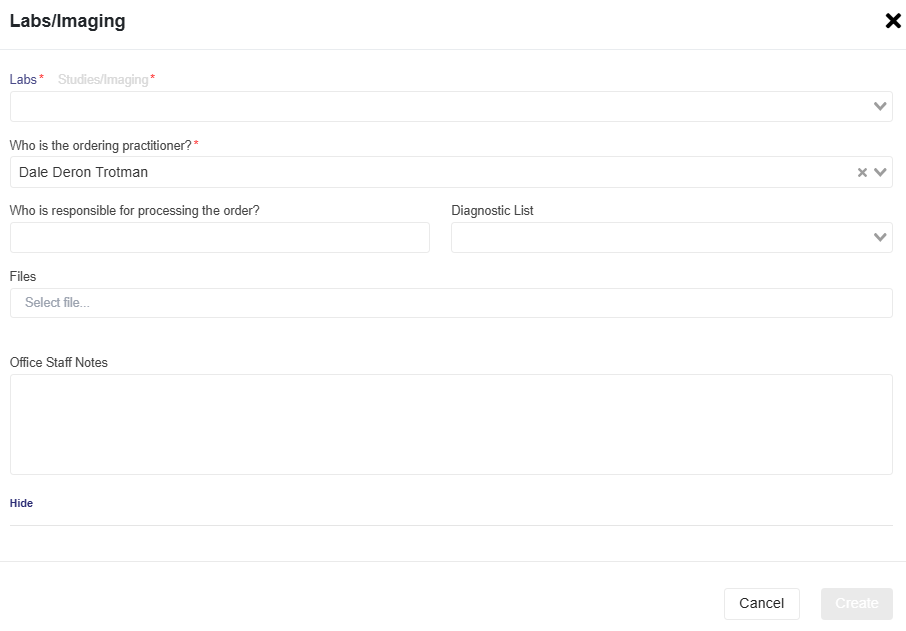
Creating an Order
- Select either the Point of Care Tests on the Objective section or the Diagnostic Tests on the Plan section
- These two tests are differentiated by the (POC) shown for the Point of Care Test.
- Select + Create order
- Select either Labs or Studies/Imaging based on the type of order you are creating.
- Search for the items you want to add to the order and select them.
- The Ordering Practitioner defaults to the user who is logged in
- Show more (optional) allows you to set who is responsible, Diagnoses related to the order, files (e.g., the image of the broken arm for the X-Ray order you are creating), and Office Staff Notes.
- Once everything is added, select Create
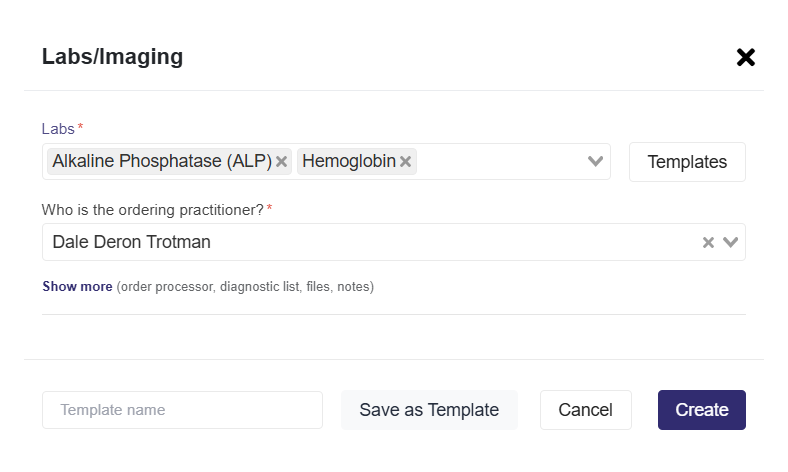
Creating an Order as Template
This is useful when you create the same order for specific types of patients, and you dont want to recreate it from scratch.
- Enter either the Labs or Studies/Imaging order you want to create in the selection dropdown.
- A template section will load in the bottom-left corner of the pop-up.
- Enter a Template name in the text box, then select Save as Template.
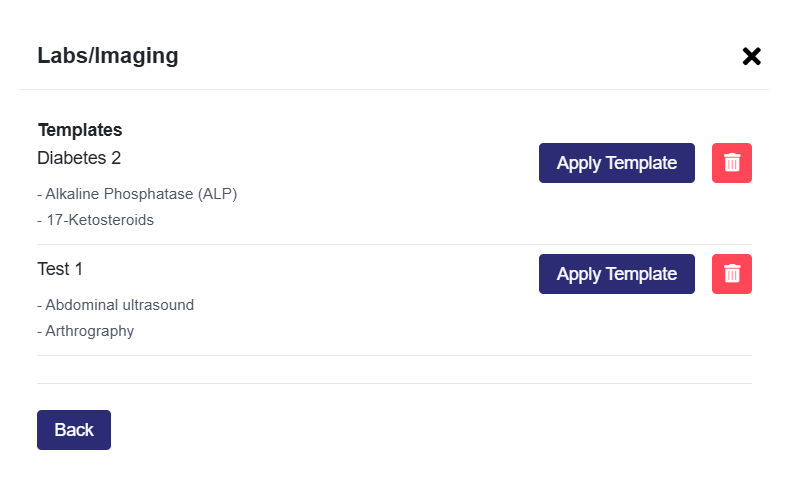
Selecting an Order Template
- Select the Templates button next to the Lab, Imaging, and Studies dropdown
- Choose the template you want to use and select the Apply Templates button
- Users can also delete templates here.
Update/Finalize an Order (Front Desk and Lab Staff can upload Results)
Please note: Front Desk and Lab Staff can upload results, but the medical professional must finalize them.
- Select either the Point of Care Tests button on the Objective section or the Diagnostic Tests section on the Plan section
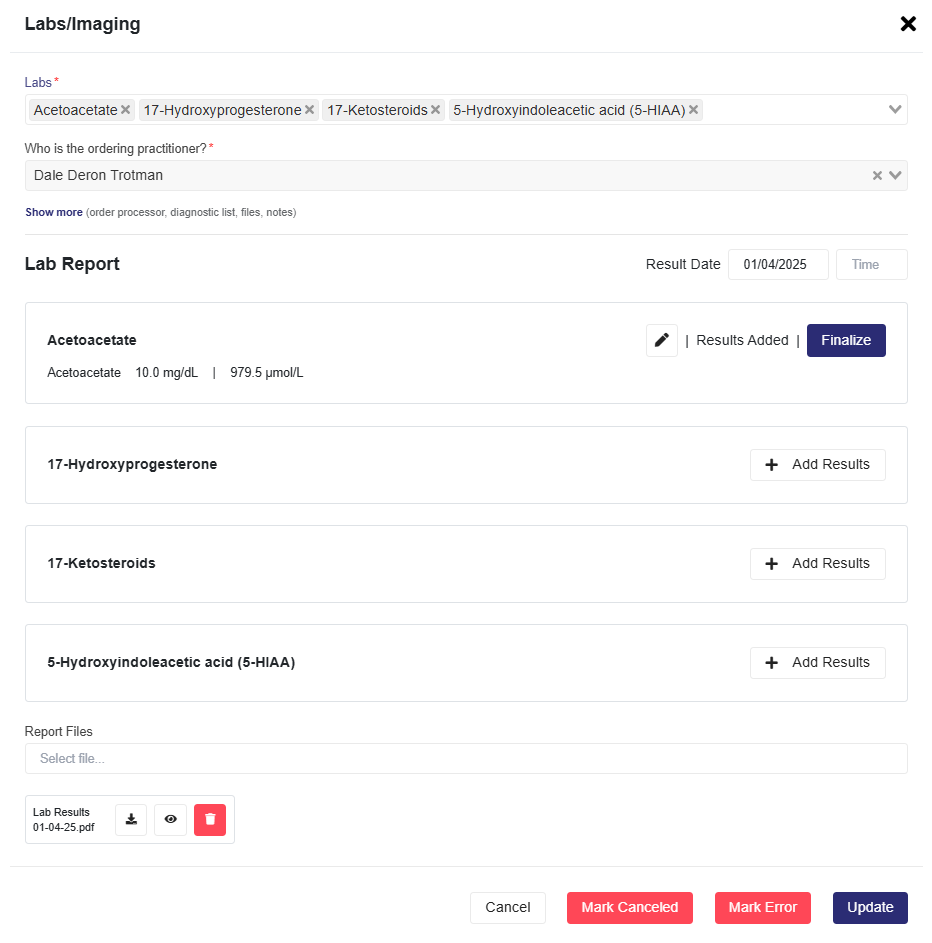
- Select the order you want to update or complete
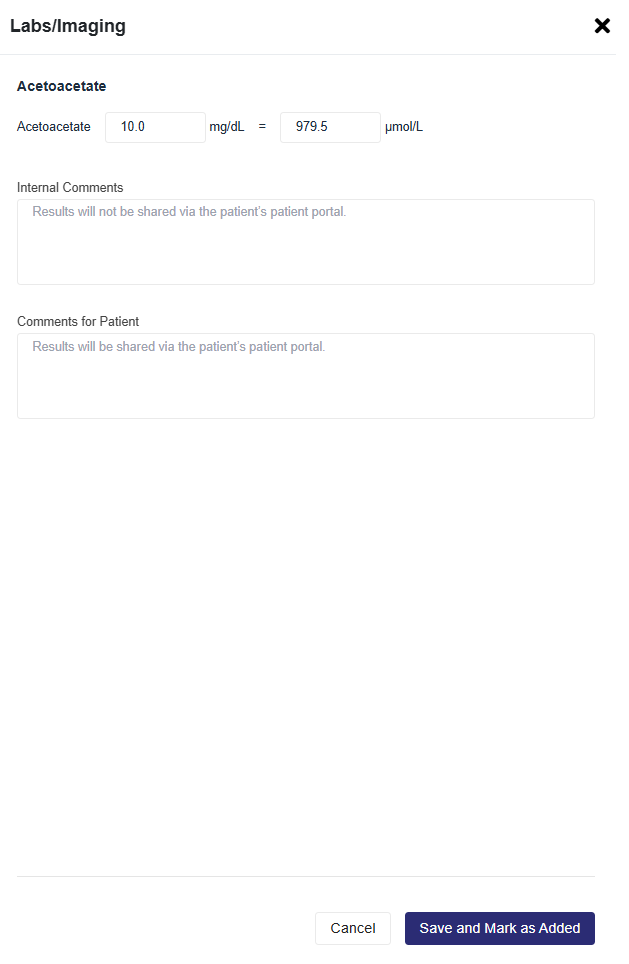
- Enter the Result Date and the (optional) Result Time in the Lab Report
- Select Update, which will load the items in the order.
- The results for each item in the order must be entered under that item by clicking + Add Results.
- Additionally, you can upload the lab report in the Report Files.
- On this popup, you can enter Internal Comments related to the results or findings in the lab report.
- Some labs will allow you to enter the values based on the report. You can enter them in Conventional or SI Units, and it will convert automatically to the other unit of measurement. Thus, you will have readings in both.
- Comments for Patients will be visible to patients in their Patient Portals.
- When finished, select Save and Mark as Added; this will also take you back to the Lab Report Page.
9. Select the Finalize button, which will now appear on the specific item for which you just entered the results.
10. If more items are in the order and you have the results, you will complete the same process.
-
- If you don’t have the results for the other items in the order when you select and finalize the items for which you have results, the status will change from Pending to Partial Pending.
11. All orders that have been fully finalized (i.e., all items in the order have been finalized) will now be visible on the Finalized page, accessible by clicking the Finalized tab, which is part of the Pending|Finalized toggle located in the top right-hand corner.
Mark Cancelled or Mark Error
Any Order can be cancelled or placed in error, even for finalized labs.
- Select the order and select Mark Cancelled or Mark Error
- If it is a finalized lab, navigate to the Finalized section using the Pending|Finalized toggle.